|
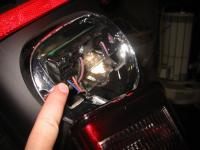
Front lights
|
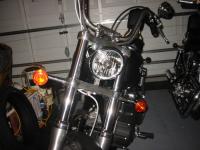
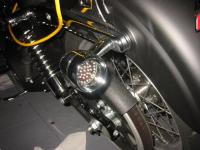
Here is what the front end looked like with the turn signals relocated to the lower triple trees (done by the dealer).
|
|
|
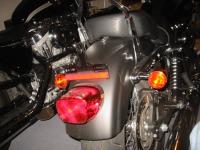
Here is what the rear lighting looked like in stock form.
|
Rear lights
|
|
Unfasten the seats
|
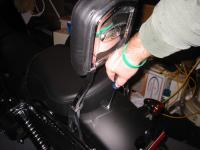
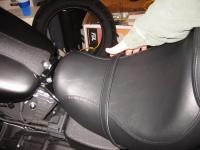
First step is to remove the seats to gain access to the wiring harnesses. In the case of the stock solo seat, plus rear pillion, simply remove the screw behind the pillion. . . .
|
|
|
Now pull the seats back, away from the tank slipping the solo seat out from under the grab strap.
|
Remove the seats
|
|
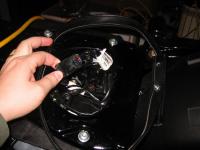
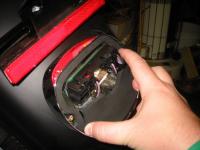
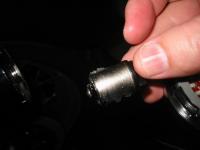
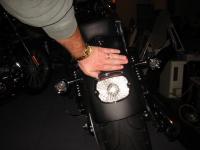
Locate the rear lighting wiring harness
|
Under the seat, you'll find the wiring harness for the rear lighting. The connector is a 12 pin AMP connector. The Kuryakyn module has a male and female connector. . . .
|
|
|
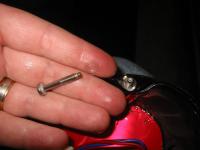
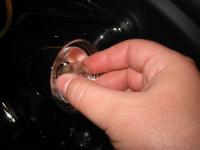
apply the provided dielectric grease to the contacts on the AMP connectors . . .
|
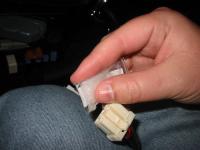
Apply dielectric grease
|
|
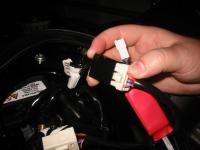
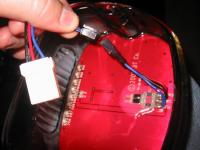
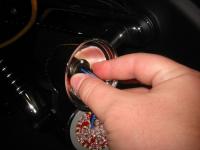
Plug in module
|
then plug the module in-line between the exisiting connectors.
|
|
The module includes a 3 pin connector for the included load balancer. Simply apply dielectric grease to the pins and plug it in.
The entire bundle of wires and electronics fits rather easily down into the hole beneath the seat.
|
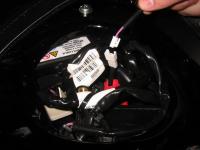
Connect load balancer
|
|
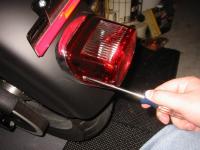
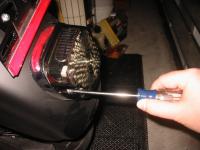
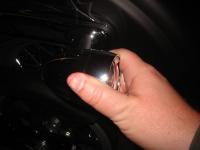
Remove tail light
|
Remove the two phillips screws to remove the tail light.
|
|
|
Unplug the stock bulb wiring harness at the connector in the base of the tail light. AMP connector release tab detail is shown in the next step.
|
Unplug the stock bulb connector
|
|
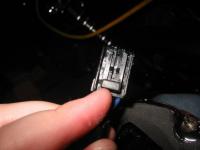
Tail light AMP connector detail
|
On the underside of the connector, you will find the release tab. Press this in and the connector will release from the tail light base.
|
|
|
Two adapter harnesses come with the tail light. Obviously, since this bike has a 4 pin AMP connector in the tail light base, we'll use the adapter harness with the mating 4 pin connector.
|
Install appropriate wiring harness to the new tail light
|
|
Install gasket into tail light base
|
The stock tail light has the gasket installed in the lens rather than the base. According to the instructions, I installed the new gasket on the base of the tail light rather than the lens. I was skeptical, but it seemed to work out fine.
When you see the inside of the stock lens, you'll realize that getting the adhesive backed gasket to fit on the lens would have been tough or impossible.
|
|
The original screws has a clear, plastic "captive" washer that held the screw in the tail light even when unscrewed from the base.
I put both screws into the new tail light and placed the captive washers on them to hold them in place.
|
Fit new tail light with original mounting screws
|
|
Install new tail light
|
Place the new tail light on the base, making sure that you don't disturb the gasket and that the lens seats properly in the base. Tighten both screws, alternating screws every few turns to ensure the tail light seats evenly as the screws are tightened.
|
|
|
Using a flat screwdriver, carefully pry off the lens.
|
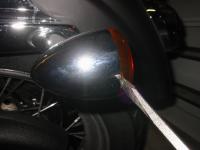
General steps for replacing turn indicator bulbs. Remove lens
|
|
Remove bulb
|
Push the bulb in and gently rotate buld 1/4 turn CCW to remove bulb.
|
|
|
The bulb replacement LED assemblies have a connector that mimics the bulb base. Apply dielectric grease to the tip and sleeve of the bulb and . . . . .
|
Apply dielectric grease to
|
|
Install LED assembly
|
plug in the LED assembly by pushing the bulb style connector and rotating 1/4 turn clockwise.
|
|
|
Press the LED assembly onto the bullet housing until it pops into place.
|
Pop entire assembly onto the bullet housing
|
|
One finished!
|
Here is a close look at the smoke lens LED assembly.
|
|
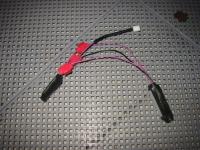
The instructions indicated that if the turn signals flash normally 4 or 5 times and then flash rapidly, then another load balancer is required. After installing both rear turn signals, things still worked properly. However, after installing both front turn signals, I experienced the rapid flash issue.
Additional load balancers come with the front set and rear set of LED turn signals. But these load balancers lack a connector and a convenient connection location.
I unplugged the load balancer installed under the seat. Here you can see the 3 wires need to be spliced with the original load balancer. NOTE: there are 2 violet wires and one black. The violets are interchangable so just get the 3 wires spliced with the blacks together.
|

Splice in a second load balancer
|
|
Spliced pair of load balancers
|
The splices provided are easy to use, but quite bulky. I stripped back the shrink wrap on the original load balancer to just over halfway. I then spliced the 3 wires, staggering the splices so I wouldn't have a bulky wad of plastic all in one place.
Just plug this tandem of load balancers back in under the seat and you're all set.
|
|
|
Here is a picture of the new front end with smoke lens LED turn signals (glow amber).
|
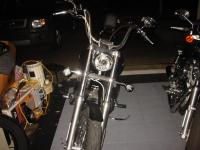
New front end
|
|
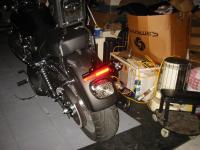
New rear end
|
Here is a picture of the new rear end with smoke lens LED turn signals and tail light (all glow red).
|
|
|
Attempting to kill some of the glare in this photo so you can see the new look. Unfortunately, from this angle, the tail light itself kicks up quite a reflection.
|
Gotta get rid of that pesky reflector on the tag bracket
|
|