|
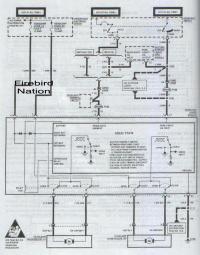
Door Control Module Wire Diagram
|
Found this wire diagram of the Headlight Door Control Module (DCM) on FirebirdNation.com. This was invaluable in helping me understand how the headlight doors worked. A lot different than I would have guessed.
|
|
|
This short description of how the headlight doors operate was a nice find on FirebirdNation.com too.
|
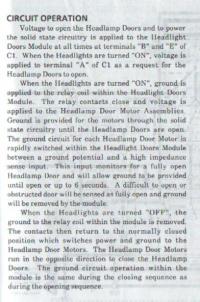
DCM Operation Description
|
|
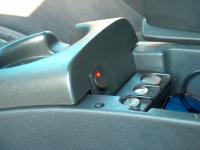
Mount Switch For Headlight Doors.
|
I sat in the car for a while and decided the switch should be hidden rather than out in plain view because its not going to be used often. So I decided to mount the switch in the center console storage bin. A 12v automotive switch with red LED light from Radio Shack fit well.
Three wires run from the switch up through the console to the dash. One ties into the Cigarette Lighter circuit for the 12v supply, the other runs out thought the dash to under the hood to control a relay, and the third is a ground for the LED light in the switch
|
|
|
This project needs an "always on" power feed. The Cigarette Lighter feed is always on and easy to tap into. The accessory panel in front of the shift is removed to access the wires. The thin orange wire is the factory feed to the cigarette lighter. It was cut and the new feed (thicker orange wire from switch) was crimped on.
|
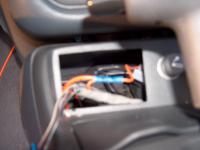
Power Supply
|
|
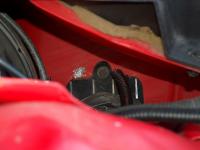
Run Wire through Firewall
|
The load line from the switch in the console was thread through the dash by drilling a 1/4" hole near the main wire loom from the fuse box.
The wire was wrapped in PVC electrical tape so it would fit tight in the hole and protect the wire from chaffing. This is the best I could do because there is no room to get my hands in there to install a rubber grommet. Then a length of split loom was added to make it look OEM and protect the wire.
|
|
The wire from the console switch connects to a double pole double throw 12v relay. The headlight door control module (DCM) is located on the drivers side of the car next to the radiator. The factory light yellow wire is powered on with the headlights, the brown wire is powered on with the parking lights. The light yellow and brown wires are cut and connected to the relay so that in its normally closed position the original circuit is maintained. When 12v is applied by turning on the switch in the console, the relay opens the light yellow and brown circuit, and applies power to the light yellow (headlight feed) only connected to the DCM, but isolates the DCM from the headlight switch on the dash. This causes the headlight doors to open as if the headlights were turned on, even though the headlights are off. When the console switch is turned off, the relay switches back to its normally closed setting, and the headlights work normally with the headlight switch.
The relay is a common Radio Shack component. Its held in place with wire ties around the DCM.
|
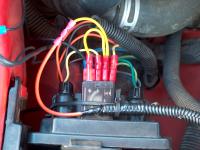
Relay Controls Headlight Door Control Module
|
|

Switch On
|
The LED lights up when the switch is ON. I know the switch is not visible when the console door is closed, but the switch came with the LED, and it looks cool, so I connected it. LOL!
|
|
This is the result with the console switch turned on. Headlight doors open and lights are off. The only draw on the system is the little LED in the switch, and the coil in the relay (about 120 milliamps, nothing to speak of). The car can be left this way for days at a time with no worry about battery drain.
Hope this helps out some Firebird owners who live in the North!
|
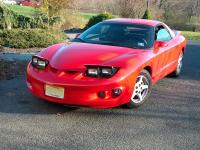
Headlights Doors Open
|
|