|
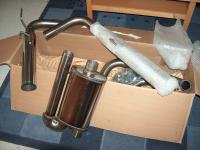
Unpacking
|
Here is the Magnaflow exhaust right out of the box. I was impressed by the packaging. First, the box is a heavy grade corrugated cardboard, then all polished pieces are wrapped in bubble-wrap to protect the finish, then a layer of packing material, the parts, and a top layer of expanding foam that holds it all together tight. Nothing bumps, bangs or rattles in the box because its packed so well.
|
|
|
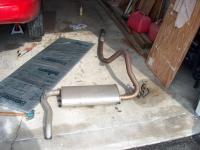
Laid out the system on the floor to check it out. All parts are there and none are damaged.
|

Assembled on Floor
|
|
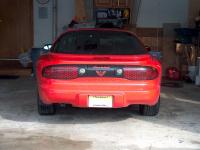
Before
|
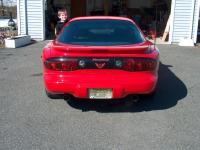
The stock single outlet system.
|
|
|
Old system came out easy. One bolt to disconnect from the Catalytic Converter, and two hanger brackets and the system was down. Then the pipe was cut just before the axle to be able to remove the system in two pieces. These parts will be saved in case I ever want to restore the exhaust back to factory.
|
Remove Old Exhaust.
|
|
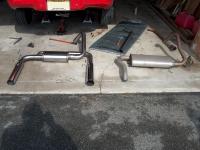
Side by Side
|
Here it is easy to see the larger pipe size of the new system compared to the old system.
|
|
|
Ready to install new system to the back of the Catalytic Converter.
|
Catalytic Connection.
|
|
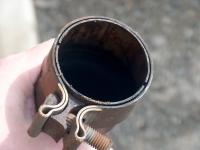
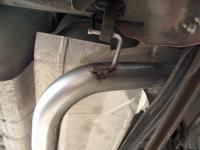
Factory Intermediate Pipe
|
The OE Intermediate pipe ( I pipe) uses a nice band clamp. The Flowmaster system uses a common U bracket that crushes the pipe. Decided to swap the band clamp for the U clamp so it can be disconnected easily if needed.
|
|
|
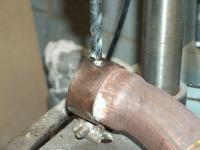
The band clamp on the factory I pipe is held in place by a spot weld. Took the pipe to the basement and drilled out the spot weld to free the clamp. Then put the clamp on the wire wheel to clean it up. Being stainless, there is minimal corrosion, but it does turn a honey color from heat.
|
Remove OEM band clamp
|
|
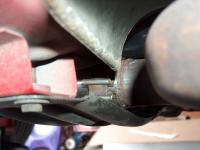
Old Clamp In Place
|
This is a tight area to work in. The cross brace cover up access to the cat to I pipe connection, and can be removed for better access if needed. I chose to work around it, and finagle the band clamp into place, same as OEM setup.
|
|
|
Re-using the OEM band clamp means the access hole in the cross brace can be used to tighten the clamp bolt. The U bolt would have required removing the cross brace to tighten the nuts, as well as crush the pipes. With the band clamp, this joint can easily be separated if need be.
|
Access Hole
|
|
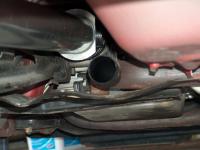
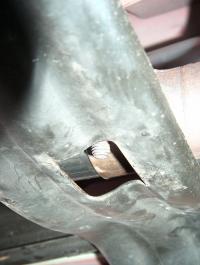
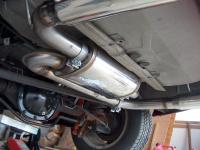
Ooops...
|
This is the pipe that goes over the axle and panhard rod (on the right). The rubber figure 8 hanger is re-used from the original system. The problem here is that the hanger is stretched out, and lets the pipe hit the panhard rod assembly. Used one of the two new Magnaflow rubber hangers here because it is thicker and shorter. Solved the clearance problem.
|
|
|
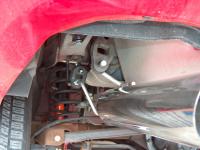
Two new hangers are needed with this system for the tail pipes. They mount to the frame using factory drilled holes. The metal bar slips inside the frame and the screws thread into it.
|
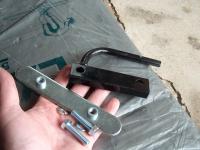
New hanger brackets
|
|
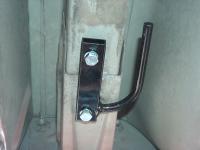
New Hanger Bracket
|
Here is the hanger installed on the passenger side. Another is installed on the driver side.
|
|
|
The muffler and tail pipes are fit together and hung on the old and new hangers. After adjusting for clearance, the band clamps are tightened to hold it all together.
|
Fit Muffler
|
|
Hangers Drivers Side
|
Here the hangers on the drivers side can be seen. The original hanger bracket with new rubber hanger is in the back, and the new hanger bracket with the old rubber hanger is close. The original rubber hanger is stretched out, and causes the system to sit slightly down hill. This is fixed by replacing the original stretched out rubber with new rubber.
|
|
|
Same setup as drivers side.
|
Hangers Passenger Side
|
|
Done
|
Finished. Sounds awesome! Deep throaty growl on acceleration, but quiets out at cruising speeds. Test drive showed the system fits perfect, no rattles or bumping of the system could be heard even under hard acceleration and washboard roads.
|
|
After looking at the car a while, I decided the tail pipes are too long for the car. I prefer a shorter look, and tucked up higher.
|
Long Tail Pipes
|
|
Marked for the Cut
|
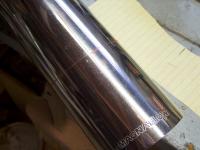
Removed the tail pipes, and decided to cut 4" of the end of each pipe, and keep the slashed tip style. Used a red china marker to write on the polished stainless pipes.
|
|
|
Started with a fresh blade in a hack saw, but quickly pulled out the saws all. Surprisingly, it didn't work well. Finally, the small Sabre Saw did the job quick and accurate.
|

Made the Cut
|
|
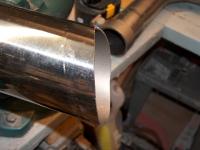
Rough Cut
|
The cut was not as straight as I expected.
|
|
|
A little application of the disk sander will clean up the tip cuts.
|
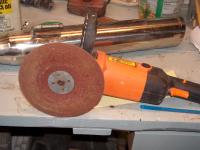
Disk Sander
|
|
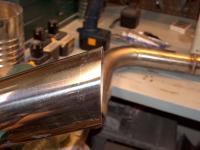
Clean Tip
|
After sanding with the disk sander, the tip is much straighter.
|
|
|
The exhaust is too loud for me. So to take the edge off of the drone in the car, I made fiberglass packed resonators to slip in the tail pipes. 9 sq ft of 6 oz chopped strand fiberglass and 12" x 24" of galvanized hardware cloth (heavy screen) are rolled together to make the resonator insert.
|
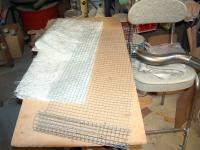
Make Resonator Insert
|
|
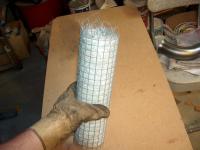
Resonator
|
The fiberglass and screen rolled up. Small pieces of aluminum wire hold the roll together on the sides and ends, "twist tie" style. The resonator is just over 3 1/2" wide to fit snug in the 3 1/2" tail pipe.
|
|
|
The resonator is in place, and the center is 2.25" diameter wide, staight through. A hole is drilled in the bottom and nut/bolt hold the resinators secure so they can't blow out under wide open throttle. A quick spray of black paint help hide them from view.
|
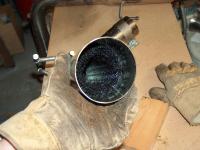
In Place
|
|
System back together
|
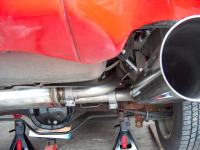
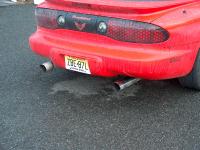
The system was reinstalled with new OE style rubber hangers ion the forward most hanger brackets, and the Magnaflow short rubber hangers moved to the rear. This change raised the tips up close to the body for a more subtle OE look. But it still leaves about 3/4" between pipes and bumper.
|
|
|
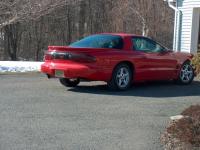
Tail pipes just stick out enough.
|
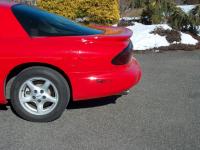
Side View
|
|
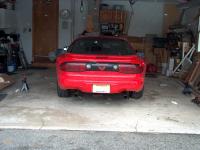
Done
|
This view shows how well the pipes are hidden. The resonators worked really well too. They reduced drone and cabin noise at cruising speeds, but left the deep growl at speeds under 40 mph.
|
|