|

Right out of the box.
|
This is the contents of the Smart Tabs package. The tabs, brackets, struts, hardware and instructions. The tabs are much thicker and substantial that I expected.
|
|
|
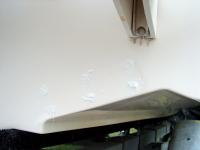
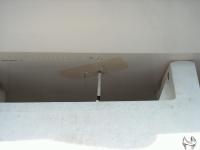
This is the transom before adding the trim tabs.
|
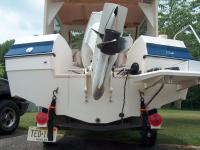
Transom Before
|
|
Test Fit
|
Using duct tape in a loop, the tabs were stuck on to check for clearance issues.
|
|
|
Measured, apply masking tape, marked and drilled holes for the hardware. Note tape on drill bit as depth gauge.
|
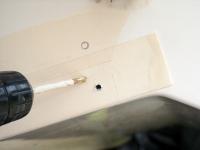
Drill Holes
|
|
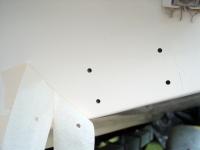
Look! No gel coat chipping!
|
This is why masking tape is used. Gel Coat does not chip when drilled through masking tape.
|
|
|
The holes were filled with a dab of 3M 4200 sealer. Very important! Water is to be kept out of the transom at all costs!
|
Seal Holes
|
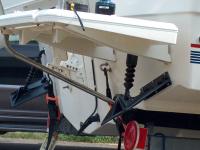
|
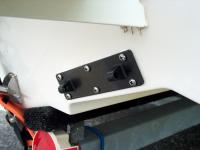
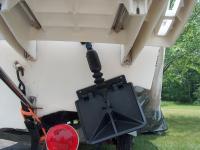
Bracket mounted
|
Kit comes with nice stainless steel screws.
|
|
|
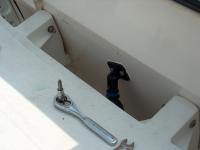
The top bracket falls behind the swim step, and makes it impossible to drill the screw holes. Tried to remove the swim step, but it became more involved than I wanted, plus the holes would have to be sealed again, so I chose another method of getting access to drill the screw holes
|
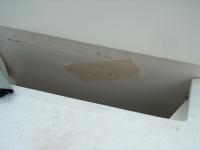
Top Braket Marked
|
|
Access Holes
|
Drilled two 3/8" holes in the skirt of the swim step, then used a 12" long bit through the access holes to drill into the transom. Worked like a charm.
|
|
|
Much easier than removing the swim step.
|
Drilling through Access Holes
|
|
Mounted Top Bracket
|
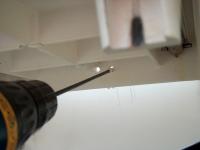
Mounted the top bracket, and tightened the screws using a Phillips bit in a small socket wrench.
|
|
|
Once the Starboard side was done, it was easy to do the port side with no obstructions.
|
Working on Port side
|
|

Done.
|
Took all of 15 minutes to mount the port side, compared to an hour and a half to do the Starboard side with the swim step in the way.
|
|
|
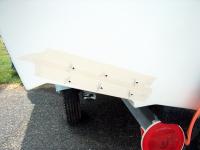
Now its off to the water and test them out.
|
Full View
|
|
Another View
|
Below Swim Step view.
|
|
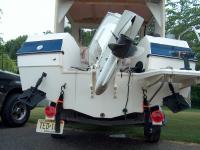
This photo is from testing, but unfortunately, I don't have an action photo. Just me relaxing in the boat.
The 80lbs Actuators were returned for 60 lbs actuators, and all seems well. The problem with the 80 lbs actuators is they were too strong for the weight of my boat. They forced the tabs down even at cruising speed, causing undo splashing and putting a lot of the hull into the water. That caused excessive drag even at the weakest setting.
The 60lbs actuators cruise smoothly, and do provide dampening for choppy water that causes porpoising, but not quite as well as the 80 lbs actuators did. This is the trade off. By changing the settings on the 60 lbs actuators, the boat should perform more like it did with the 80, but not throw water around as much.
All in all, a very good product that greatly improves performance and overall handling.
|

Trial Review
|
|