|
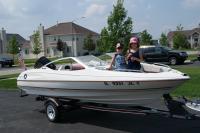
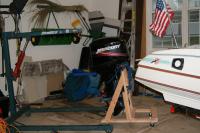
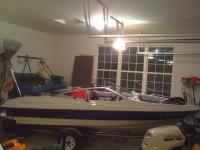
The day I brought her home
|
Here she is my Bayliner Capri 1700. I found out she has a rotten deck so i'm planning a complete restore. I already replaced the force outboard with a brand new Mercury.
|
|
|
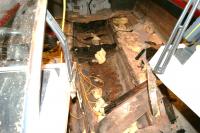
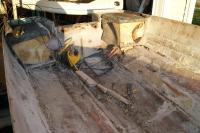
the plywood deck started to rot between the bow seats, so I've started ripping out the deck.
|
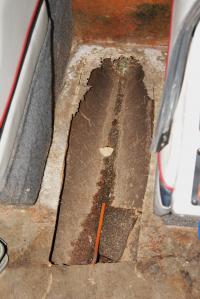
Rotten decking in the Bow
|
|
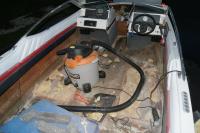
Seat bases ripped out
|
Removed the seat bases today, still need to do more grinding
|
|
|
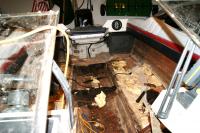
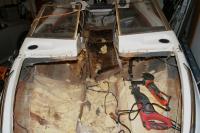
Started removing the deck today. Bulkheads are totally rotten. Stringers have mush inside them where bulkheads attach. Good thing i'm doing this now. Hope it hasn't made it to the transom yet!!!
|
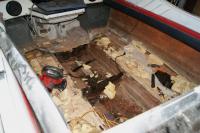
Restore Day 3
|
|
Deck partially removed
|
View with rear deck partially removed, ROTTEN Bulkheads!!!
|
|
|
Rear deck removal in progress
|
Another of Rear deck
|
|
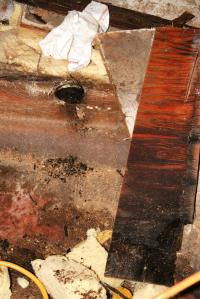
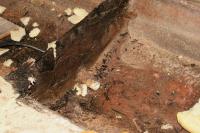
Cross member Rot
|
The piece of wood on the right was a cross member between the stringers. Its totally rotten, and the black hole where it attached to the stringer is full of mushy rotten stuff that used to be wood.
|
|
|
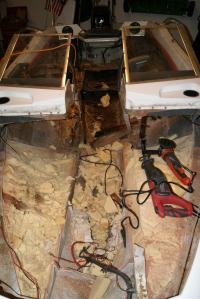
Have to get the bow seating out to get to the rotten deck underneath. Its a shame because the bow seating itself was very sound structurally, and the foam was bone dry.
|
Bow Seating Coming out
|
|
Bow seating mostly out
|
Removed support for console and bow seating, need to work on getting the foam out of the bow, and grinding the hull clean in the bow.
|
|
|
Closer view of the bow
|
Closer view of the bow
|
|
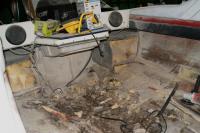
Blatent Stupidity in construction!!!
|
They put PVC pipes through the bulkheads, I'm assuming to allow water to flow, but obviously what it did was stop 2" of water from draining out when the bow was raised. All of the bulk heads are rotten because of this. I'll be putting drainage holes in my new bulkheads but this PVC was STUPID!! My only hope is that it kept most of the water forward and saved my transom. The transom seems to be sound, but there is so much rot in the boatt i'm beginning to think i've been fooling myself about the transom too. Reality of what I bit off hit me today, got a lot of chewing to do over the winter...
|
|
|
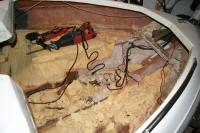
I got the stringers and bulkheads out. I knocked out the bulkhead with a hammer (totally rotten) and then used the angle grinder to grind the fiberglass off the top of the stringers. After that I ground a groove along the glass on the inside of each stringer and removed it. I was then able to take a pry bar and pry up on the stringers vertically and they came out relatively in tact. I'll use the old stringers as templates for the new ones.
|
Stringers and bulkheads are out
|
|

Holy Sh!t
|
SURPRISE!!! The Transom is Rotten too. Here is where the transom was tied into the Port Stringer! Well I guess its time to build a motor stand for when I pull the cap off. I'm going to put the front section of floor in first though to hold the hull in shape when I remove the cap. I still have alot of clean up grinding left on the hull, but i'm seeing some light at the end of the grinding tunnel at least. I'm hoping to be finished grinding next weekend. I should have three days over the Thanksgiving weekend to work.
|
|
|
I rented a cherry picker and pulled the motor off in preperation for the future transom repairs. I just used heavy rope under the engine bracket and winched her off after removing gas, electric, throttle/shift cables. Had to remove steering cable as the motor was coming off due to space issues with the swim platforms.
|
Motor is off
|
|
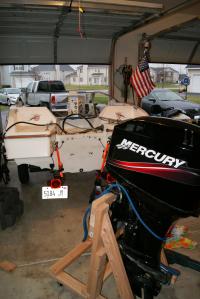
Ah is good to have the motor off.
|
Need to finish up grinding the floor this weekend so i can get the front portion of the floor put in and then pull the cap to allow access to the transom.
|
|
|
About 2 weeks into the project now... been working in my spare time. I decided to pull the cap off and fix the transom first. Took me a couple hours to build the rigging out of 2x4s. The 2x4s barely managed. If I had it to do over it would be 4x4s, but I got it off.
|
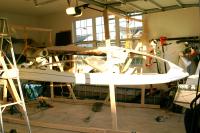
Cap came off today
|
|
Hull
|
Here is the inside of the hull. It's getting there, but still needs alot of grinding/sanding to prepare it for fresh fiberglass.
|
|
|
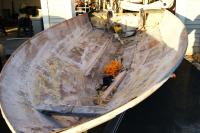
These bayliner's have a stepped transom with floatation boxes on each side.
|
Stepped transom
|
|

Transom
|
Heres a close up of the transom. I still need to grind the glass from the edges and pry out the plywood. Looks like they laminated a peice of 1/2" plywood to a peice of 5/8" plywood. Shouldn't be too tough to replace (I hope) since its such a small piece of wood.
|
|
|
I finished removing the old transom, and cut a out replacement of 2 sheets of plywood laminated together using chopped strand mat. This is the new transom fiberglass in with chopped strand mat and roving.
|
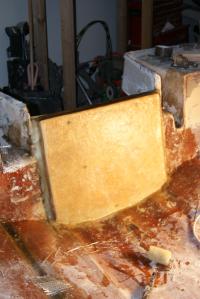
New Transom is in
|
|
Another view of the new transom
|
I just need to build and install the transom brace and cover the floatation boxes on either side of the transom with plywood and fiberglass. Then I'll be able to put the cap back on and start on the stringers. I highly recommend uscomposites as a source for fiberglass they shipped quickly, their prices are good, and their 435 poly resin was way easier to work with then the general purpose resin i bought locally.
|
|
|
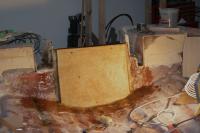
Finished fiberglassing the floatation boxes and installing the transom knee brace.
|

Transom boxes and knee braces fiberglassed.
|
|
Paint job
|
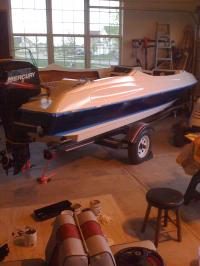
Paint is done
|
|
|
Used Rustoleum Marine... Gloss White and Navy Blue.
|

Another view of the paint
|
|
(Insert New Caption)
|
(Insert New Description)
|
|
|
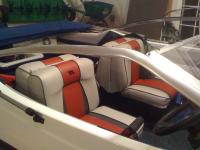
Bow Seating with new vinyl
|

Bow seating / Vynil
|
|
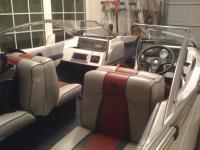
Interior
|
Interior Stern View
|
|
|
(Insert New Description)
|
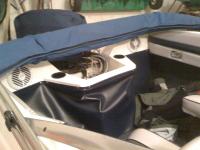
Bimini and Gas Tank Cover
|
|
Exterior Complete
|
Exterior
|
|
|
SPLASH!
|

Shakeout Run
|
|