|
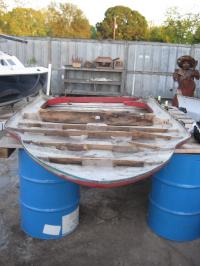
Before....
|
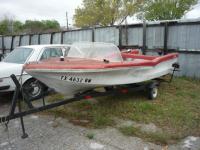
The title says 1960, the body style says 1959 or even 1958. I'm guessing that it was made late in '59 and didn't make it to the dealer until 1960.
The original color was turquoise over white. I plan to return to that.
|
|
The inside looks even worse than the outside. The dude I bought it from sat in a cooler in the stern and steered his 75hp Johnson with a tiller. It was used for fishing in a small lake.
It arrived with a battery box lid, a mounting bracket for a gps, and some really funky flood lights. It didn't arrive with a wheel.
|
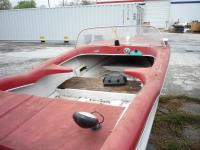
The inside.
|
|
Getting Started
|
Have the windshield off and am starting to remove what little trim remains. The aluminum rub rail is bolted through the deck and hull holding the two together like a shoe box. Once the rubrail is off the deck dropped down over the hull. Any adhesive used in 1959 is long gone.
|
|
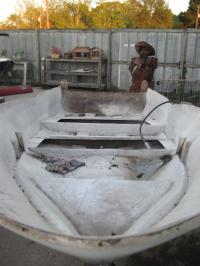
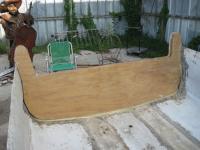
The deck lifted off easily, the hull is going to be much easier to get to. I've cut out the area under the seats so that it can be reinforced and so that I can install a better way to get the bilge water to the stern so that the pump can take care of it.
I'm glad Glastron didn't use wooden floors as they would be rotten by now as well.
Currently the plan for the floor is to us spray-in truck bedliner in colors that match the deck. This will hide the miserable glass work that is visible now and provide a bit of sound insulation.
|
Deckless
|
|
Deck
|
At some point someone jumped on the deck and snapped two stringers. This is some really rough work. I'm assuming that Glastron was cranking out these babies pretty quickly.
|
|
|
Glastron used woven roving on the ends, just dipped in resin and laid in place, and chopped strand to support the stringers in the middle. That roving is hard as a rock.
|
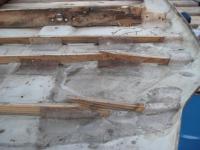
Close up of broken stringers.
|
|
Transom
|
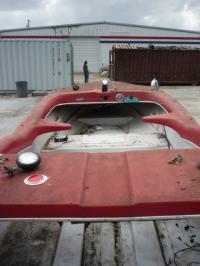
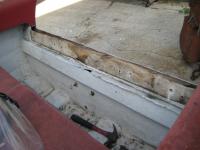
The old girls rear looks 50 years old.
|
|
|
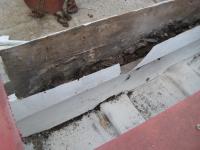
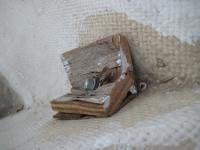
I've removed the aluminum transom cap, it's beat all to heck. There appears to be a pine 2/4 at the top of the transom.
|
Rot
|
|
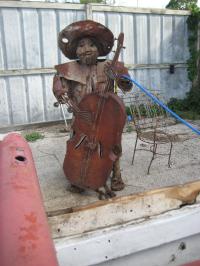
Helper
|
Pancho holds my air hose and keeps his opinions to himself.
|
|
|
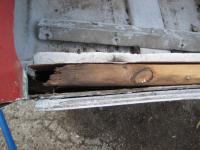
I've made the first pass with the cut-off grinder. The plywood shows some signs of rot.
|
More rot?
|
|
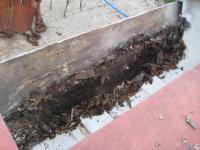
Rich topsoil.
|
The inner skin is removed from the transom. I'm thinking I'll need a few more bottles of Git-Rot. This is more compost than plywood.
|
|
|
Maybe I can sell this old transom on Craigslist.
|
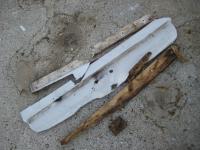
Bits
|
|
Bow Eye
|
Note: Don't use a bit of old fiberboard cabinetry for the backing of the new bow eye.
|
|
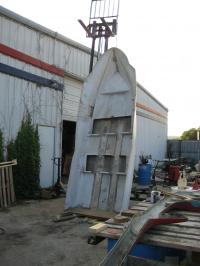
I've fabricated a new transom and stuck it in. I didn't take any pics of the process since my Canon PowerShot camera crapped out. I've since gotten it back from the repair center so I'll start keeping a better log of my progress.
Anyway, I made a template of cardboard then thin ply then used the plywood template to cut two bits out of 3/4" marine grade ply. These I glued together with Clark Craft GL-10 super glue (www.clarkcraft.com). The laminated joint is now stronger than the plywood itself.
Harbor Freight had 3" C Clamps on sale for $1.99 and deep jaw clamps for $7.99 so I stocked up. At the bottom of the transom where the clamps wouldn't reach I wedged 4 2x4s between the transom and the seat base. Hopefully I have a tight fit with no voids. I do like a tight fit.
|
New transom
|
|
Don't try this at home.
|
There was a gap between the new transom and the inner sides of the hull so instead of trying to force thickened epoxy into the voids I hoisted the boat up so that the transom was horizontal. Then I pored slightly thickened resin into the gap. By adjusting the angle of the boat I was able to make a fair fillet.
I did have a little trouble with the backing plate for the bow eye. When the boat was just about vertical the rotten chunk of particle board snapped in half and fell away. Luckily the washer was large enough to prevent disaster.
|
|