|
|
 |
|
| home |
| |
shopping |
| |
contact |
| |
projects |
| |
Warning: Undefined array key "session_logged_in" in /home2/sap/public_html/header.php on line 612
login | | | join |
|
|
|
|
Rebuild Phase
|
 |
|
|
|
|
|
|
|
|
|
|
|
Dry Fitting
|
|
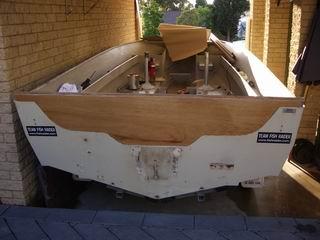
There are two schools of thought when it comes to installing transoms. One is to install one layer of ply at a time, the other is to glue the pieces together outside the boat and install the transom as one piece. I don't claim to know which is the best way and I spent many hours deliberating over this issue. This wa smade more difficult in that the two people advising me (both of whom I respect as foremost authorities on the subject of boat building) take differing views which they staunchly defend. In the end I decided to cut the two pieces out and make my mind up after I had dry fitted them. Hopefully at this point in time the optimal solution would be evident.
My old transom was 12mm thick at the bottom and was reinforced to be 35mm thick at the top. As a result, along the bottom there was a 'seat' where 12mm thick piece of ply dropped in nicely. It is normal practice to install the thickest sheet first (i.e. at the back of the boat) however I decided to break convention to take advantage of where the old piece bedded in and install the thin layer first. I also figured it will be easier to fine tune the thin piece and use this as a template for the thick piece.
The other thing you need to consider is that the transom is not perpendicular to the bottom of the boat. As I don't own a protractor I cut a piece of paper at the angle the floor meets the transom. I then set the circular saw at that angle which was 17 degrees off perpendicular.
I traced out the template on the thin piece of plywood. I cut along the bottom of the transom at the abovementioned angle and cut the sides at 90 degrees. In the corners and where I couldn't get the circular saw into I finished the cuts with the jigsaw. I left esxcess timber along the top of the transom as I would trace the top of the existing transom skin later so it is exact.
I then attempted my first dry fit. The ply was too wide and deep in places so I marked the high points and planed them off. Each time the transom fitted a bit better and after a couple of hours of patient work and around 8-10 dry fittings I was happy. It is VERY important to round off the back edge of the transom to allow it to fit snugly. A square edge WILL leave gaps.
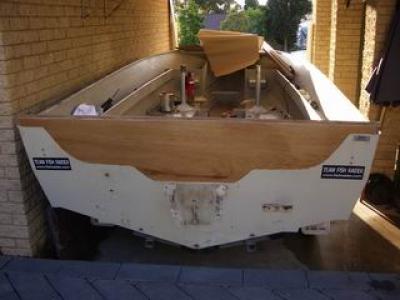
I used the thin ply as a template for the thick ply and cut it out, again with the offset angle on the bottom. I repeated the dry fitting and fine tuning exercise although this time most of the hard work was done and it only took a few fittings to get it right. My theory that it would be easier to fine tune the thin timber was proven correct as lugging the thick piece out of the boat was bloody hard work as it weighed a ton.
Now it is time to evaluate which fitting method if the best. Both pieces sat perfectly flat together so i elected to assemble them outside the boat and install the transom as one piece.
To ensure the two pieces stayed perfectly alligned banged a couple of self tappers in the part of the transom that would be cut off later before removing it from the boat. I laid the two sheets (screwed together) on sawhorses (this took a helper as it was BLOODY HEAVY) and before I removed the screws I drilled a couple of 8mm holes (again in the waste timber) into which I dropped a couple of screwdrivers. This way I can always reallign the pieces perfectly.
|
|
|
|
|
|
|
|
|
All projects on Shareaproject.com are user-submitted and should be used for reference information only. The projects are not intended to be complete "How-To" articles. Use the information contained in these projects at your own risk. Projects are not checked for completion, accuracy, or safety and therefore cannot be guaranteed in any way.
Outdoor Blog
|