|
|
 |
|
| home |
| |
shopping |
| |
contact |
| |
projects |
| |
Warning: Undefined array key "session_logged_in" in /home2/sap/public_html/header.php on line 612
login | | | join |
|
|
|
|
Rebuild Phase
|
 |
|
|
|
|
|
|
|
|
|
|
|
First attempt at fiberglassing
|

|
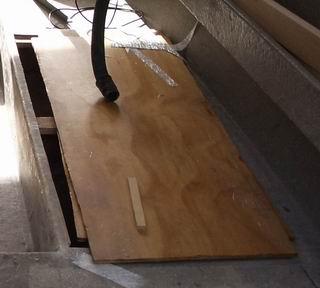
Now time for my first ever fiberglassing effort! I was a bit nervous but I have done plenty of reading to compensate for my lack of practical experience. I decided the undersides of my floor panels was a good place to experiment as nobody will ever see them and there's margin for error.
I precut my fiberglass mat and laid my floor sections on sawhorses, got all my tools ready and poured Acetone into a container ready for cleanup. I poured 1.5 litres of resin into a container (thinking this will be plenty) and was about to add the catalyst when I realised I had no mixing stick and for the life of me I couldn't find an appropriate piece of scrap timber (in a panic I ended up using the flat tool you use to undo the flanges on an angle grinder!).
I donned my rubber gloves and eye protection (hardener is nasty stuff) and added my catalyst. I was told by the supplier to add a capful per litre so I added 1.5 capfuls and mixed for around a minute.
I poured some (now catalysed) resin on the timber and brushed it all over. On the first attempt I was a bit stingy with the resin and in retrospect I should have put a thicker coating on. I laid the mat over the wet resin and began wetting the mat through. I was expecting the glass to wet through immediately and was wondering what I was doing wrong. As it turns out it takes a few minutes for the resin to really soak in and this is facilitated by using a fiberglass roller. It was about here I realised I was a good litre short of resin and began to panic. I hurredly mixed another batch thinking I'd completely botched the job but it was no problem at all as the resin I'd already applied was still wet and I just continued where I left off. Anyway after 5 or so minutes the glass was all clear and looking good.
For the second floor piece I over compensated and this time made around 750ml too much resin!!! This time I put much more resin on the wood which then soaked through the underside of the mat and made wetting it through much easier.
I then dumped my tools in Acetone and ran inside to get ready because I was late for Rugby! How time flies when you're fully occupied!
When I got home the resin had cured however the resin was a bit white in colour. I might have been a bit heavyhanded with the hardener or maybe a bit overenthusiastic with the roller??? Anyway it doesn't seem to be a problem as the glass was hard and well adhered to the timber.
The floor sections (which are only 9mm ply) had warped quite a bit but as they are to be screwed into the boat that shouldn't be a problem. Maybe when I glass the top they will 'unwarp'!! Time will tell.
Sunday I made some bridging blocks (supports for the floor sections and screwed them in with stainless self tappers. These are really just to support the floor in the right position as it's installed and the glass will be taking most of the load.
This weekend I won't be doing much work on the boat as it's my daughters 2nd birthday. I have to clean up, go shopping (for beer!) & work in the yard on Saturday before Rugger. Sunday is the party and my brother is down from Port so there will be plenty of beer consumed!
|
|
|
|
|
|
|
|
|
All projects on Shareaproject.com are user-submitted and should be used for reference information only. The projects are not intended to be complete "How-To" articles. Use the information contained in these projects at your own risk. Projects are not checked for completion, accuracy, or safety and therefore cannot be guaranteed in any way.
Outdoor Blog
|