|
Boring out 6061 aluminum stock
|
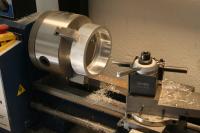
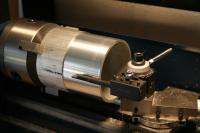
I purchased several lengths of aluminum piping in various inner and outer diameters. Each section was bored out and turned down on a Cummins 7x12 lathe. Here the focuser adapter is being bored out to match the GSO focuser's outer diameter.
|
|
|
Here the focuser adapter is being turned down to fit snuggly inside the hastings pipe.
|
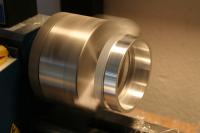
Turning down 6061 aluminum stock
|
|
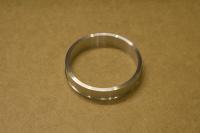
Completed Focuser Adapter
|
The finished piece will be anodized red.
|
|
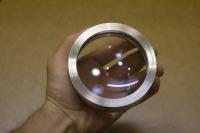
I'll be the first to admit this isn't the most ideal way to design a lens cell. Mine is basically a pressure fitting held together by three 4-40 machine screws. The depth of the lens well in the left-hand piece is slightly less than the thickness of the objective. This design was actually a last-minute improvisation after I realized my lathe wasn't cutting threads properly. I hope to replace this cell with a more traditional screw-down style where the interior of the lens well is partially threaded.
The finished pieces will be anodized black.
|
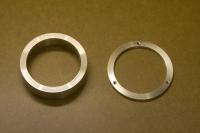
Completed Lens Cell
|
|
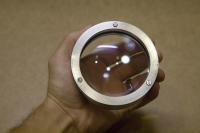
Installed Objective (front view)
|
(Insert New Description)
|
|
|
(Insert New Description)
|
Installed Objective (rear view)
|
|
Machining the dew shield
|
Another confession - here I'm doing it wrong. My lathe isn't intended to turn out something this large, so I used a fully extended boring bar to turn the outer diameter of the dew shield. After several passes I was able to gradually eliminate the amount of chatter in the tool. In the end I got a nice smooth surface that looks like it was machined with a standard turning tool.
|
|
|
This is a homemade template I created to help me drill perfectly verticle holes into the curved surfaces of the focuser adapter, dew shield, and hastings tube. The jig is held in place by a milling vise installed on my drill press. The vise allows fine positioning of work under the bit.
|
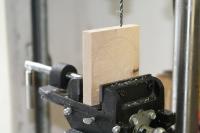
Homemade drilling jig
|
|

Focuser adapter & drilling jig
|
Here I'm using the drilling template to pop three mounting holes int he focuser adapter. These holes will line up with equally spaced ones in the hastings tube.
|
|
|
(Insert New Description)
|
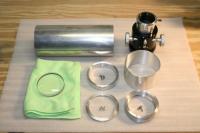
Complete view of parts
|
|
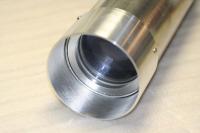
Lens cell & dew shield installed
|
(Insert New Description)
|
|
I recently had first light with this bare-metal OTA on February 21, 2009. My autoguider came to focus at about two thirds travel, a bit further than I'd planned but not an issue at all. Stars came to a nice points in the PHD viewer. That'll work!
Collimation is....well, imperfect. I attribute some of my problems to the hastings pipe being less than perfectly round. The cross-section is actually a very slight oval with some excentricity that various about the circumference. Andy at HPO tells me that their piping, while very popular among ATMers, is not manufactured to be perfectly round because it's not necessary to perform perfectly well as irrigation pipe. Makes sense.
At some point in the future I may seek out a better tube for this scope. In the meantime it does it's job exceptionally.
The final appearance of this OTA will be black powder coating for the hasting tube and dew shield. The focuser adapter will be anodized red for a subtle color accent that matches those found on the astrograph. The lens cell will be anodized black.
|
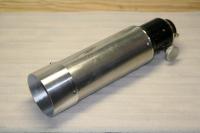
Assembled OTA
|
|