|
It gets worse
|
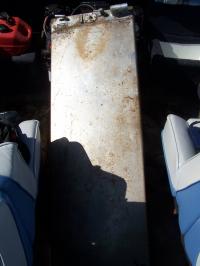
Rot showing itself. As I pulle dback the carpet, it was clear that this was going to be more work than I anticiapted. Ain't that always the way though?!
|
|
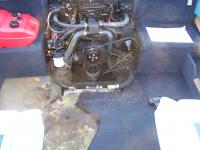
And so it begins.......
This view is near the stern end on the Starboard side. Doesn't look too bad until.....
|
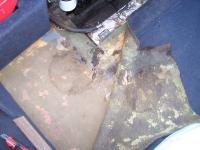
Pulling back the carpet
|
|
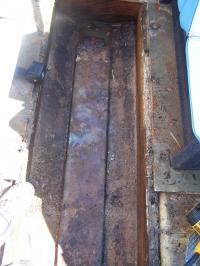
Yuk.
|
Three soft spots that are quite large. Looks like the stringers are mulch too.
|
|
|
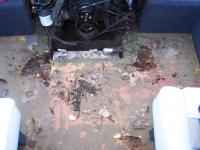
Every time I puill up a corner I see bad things. Here some standing water. The foam is saturated in spots as well.
|

Standing water
|
|
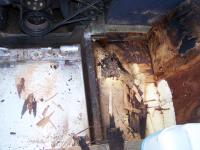
Stringers are rotten too.)
|
The srtringers will need replacing, as will the flotation foam.
|
|
|
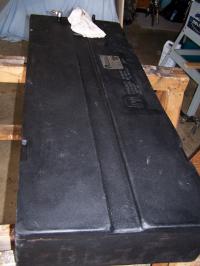
Taking out the tank and to the dump. It leaked when I bought it, so I was using a portable tank. Ebay has lots of tanks, so hopefully, I'll find a comparable replacement.
|
Fuel Tank Coming Out
|
|
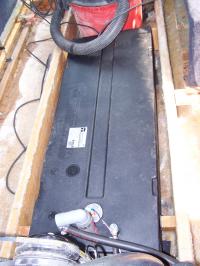
Floor Under Tank
|
Lots of standing water under the tank.
|
|
|
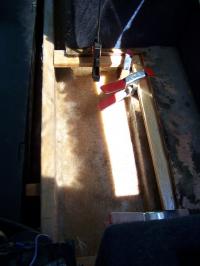
This is a tough one. The pedestals are glassed-in and will need to be cut out so I can get at the floors. It's a shame to have to do this, but I don't think there's any other way.
|
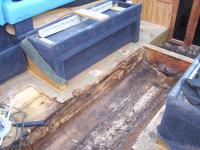
Seat Pedestals
|
|
(Insert New Caption)
|
(Insert New Description)
|
|
|
Purchased a new tank made by Tempo. It's a 25 gallon plastic unit.
|
New Tank
|
|
New tank in place
|
New tank in it's final resting spot. New spade connectors for the sending unit and new hoses complete the job.
|
|
|
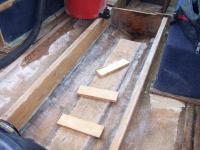
I epoxied and screwed ledger strips to support the floor.
|

Ready to lay floor.
|
|
More of the ledger strips
|
More of the same. After these photos were taken, I screwed down 3/4 inch marine ply. I then hole-sawed a few holes in the deck to allow me to pour some two part foam into the voids. I placed a few empty plastic bottles in the voids forst to save on foam. This worked real well and the floor is as solid as can be. No photos were taken 'casue I got so caught up in the job. This was a job I do not wish to repeat anytime soon! That said, it was manageable and went very well. My advice? Try to avoid looking at the bigger picture and tackle things one little job at a time lest it become overwhelming. DON'T GIVE UP! YOU CAN DO IT!
|
|