|
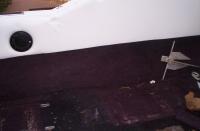
Useless space
|
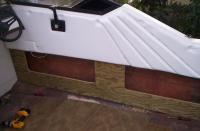
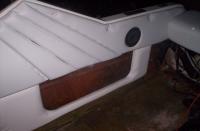
You can see the open space left behind by some previous owner cutting out the side assembly. My plan is to rebuild some kind of storage system on the sides and match it to the floor and white upholstery. This project is actually concurrent with my "Replacing Boat Floors" Project...so the carpet won't be an issue...it's being torn out and replaced with another material called Nautolex.
|
|
|
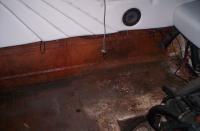
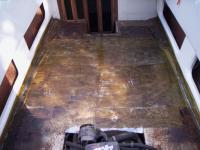
The carpet has been removed in preparation for the deck replacement and Nautolex installation, as well as fiberglassing in the new gunnel pieces.
|

Same side, no carpet
|
|
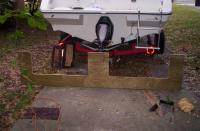
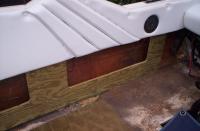
Another View, Starboard
|
Here's another view of the empty underside of the side upholstery. This time from starboard.
|
|
|
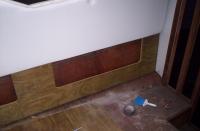
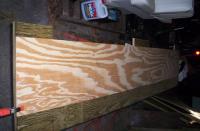
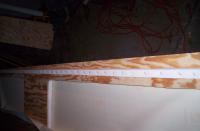
For the new storage spaces in the gunwales, I'll be using 3/4 inch pressure treated plywood coated in epoxy. Heres the first cutout...I made a template by deciding (arbitrarily) how big I wanted the openings to be, then traced and cut them with a jigsaw. Here you can see the first part. I repeated this procedure for both sides of the boat...both are identical.
|
New Gunnel Cutout
|
|
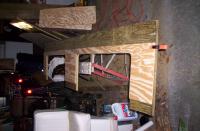
Port side dry fit
|
Before upholstering or fiberglassing anything, I wanted to dry-fit to make sure everything looks and fits the way I expected it to. It does!!
|
|
|
Same thing...everything fits perfectly.
|
Starboard dry fit
|
|
Another Dry Fit View
|
Here's another view of the dry fit, this time looking astern. I think this will look awfully good when it's done. Now that I'm satisfied with the dry fit, it's time to pull them out and start upholstering
|
|
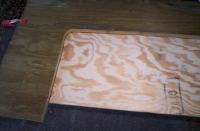
I plan to fiberglass the structural parts of the gunwale into the boat, which means they won't be removed anytime soon. I don't want the upholstery to be "permanent" though, so I'll be making another, separate piece that will be upholstered and attached to the structural gunwale base. If the upholstery is damaged, this will allow me to work on it without having to tear apart the boat again.
For this I'll be using a simple, no frills 1/4" sheet of plywood coated with epoxy.
Here it is, cut to size and clamped to the gunwale part.
|
Gunwale upholstery
|
|
Cutting the upholstery part
|
After clamping the new "upholstery part" to the gunwale, I traced the cutout lines and then cut them out of the new part with a jigsaw.
|
|
I used 3M Super 77 adhesive sealant to attach 1" foam to the new upholstery part, cut to shape. If you haven't used this adhesive, you should check it out..it's relatively cheap and comes in three strengths..77, 80 and 90. It's awesome, and since I discovered it, I don't think I've done a single project where I haven't used it one way or another.
In fact, I'll be using the 90 strength spray to attach my nautolex floor. I'm not sure how that will hold up the marine environment, but it will be easy to fix if it fails, and for the ease of use and cost savings over the branded Nautolex adhesive, I think it's definitely worth a try.
|
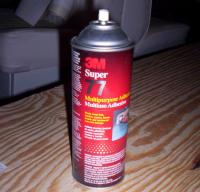
Great Adhesive
|
|
Gunwale Assembly Clamped
|
Here's the new gunwale assembly clamped together and ready for upholstering. The assembly consists of the structural gunwale part, followed by the 1" foam, followed by the upholstery part.
|
|
For this assembly, the upholstery part and foam will be covered with marine vinyl on the bottom, two sides (bow and stern), and top, but I will not attach the vinyl in the "cutout" areas yet.
I started by running a line of staples through the vinyl on the long, bottom edge of the upholstery part. (the plywood underneath is just being used as a table - not part of the project)
|
Upholstery start
|
|

Three Sides Upholstered
|
Here is the new upholstery part in place on the gunwale assembly..finished being upholstered on the three sides, but still not cutout. The whole upholstery process is pretty much the same..just make sure the vinyl is tight and smooth with each staple you put in.
I'll cut the vinyl to shape in the cutout, leaving enough material to wrap not only around the foam and upholstery part, but also around the gunwale structural part itself..this way you won't be able to see the plywood.
|
|
|
Here's the starboard gunwale, fully upholstered and dry fit into place. The upholstery part has been attached to the structural part from behind with stainless steel wood screws, and the "cutout" area vinyl has been wrapped all the way around to the back and stapled into place.
|
Upholstery in place
|
|
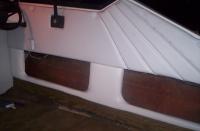
Gunwale Stern View
|
Here's the stern view of the new gunwale...I think this turned out pretty good. It matches the existing upholstery well and will provide MUCH needed storage that my boat has been lacking.
There are still more details to complete, such as a flat "floor" surface inside the gunwales, and some kind of coating inside so that you can't see the raw fiberglass of the hull through the openings, as well as some foam massaging to get rid of some of the "lumps" you can see in the upholstery in this picture.
I'll do the port side the same way, then remove both so I can start fiberglassing the floor!
|
|
|
This is the best view I could get of both sides fiberglassed into place...along with the new floor glassed in.
|
Fiberglassed into place
|
|
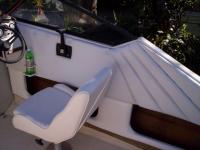
Starboard View - Almost done!
|
Starboard View - Almost finished!
|
|
|
Full View - Looking pretty good. All that's left to do is figure out what to line the inside with. I need to find a good material that will protect the hull from things that are tossed in there, and something that will dry fairly quickly in case water splashes into the space.
|
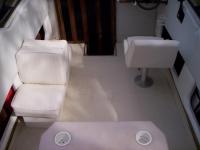
Full View - Almost Done!
|
|