|
(Insert New Caption)
|
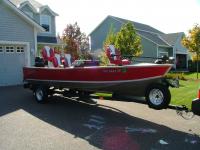
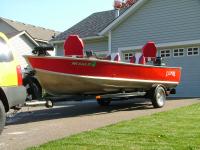
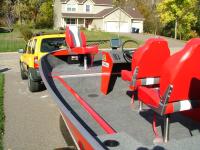
Here's the finished project.
|
|
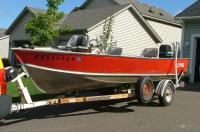
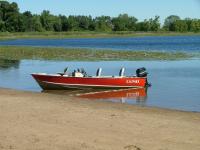
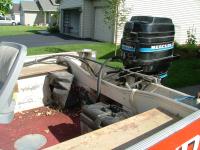
Here's what we started with. It's a 1983 Lund Mr. Pike 18' with a 50 hp Mercury, power tilt, a Humminbird Wide View fish locator, a travel cover, and other odds and ends the seller threw including a speed prop, the original windshield, tons of life jackets, old fishing rods, nets, two gas cans, oil, and various other stuff.
The roller trailer has a great deal of surface rust, has a tweaked fender, and needs tires. It is equipped with an electric winch for loading, side rollers, PVC guides, and bearing buddies. The wiring is a mess, but it works properly.
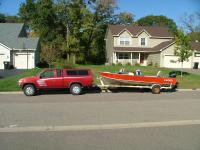
The trailer towed well on the way home, but the tires are flat-spotted from sitting. They got better with each mile, but will be replaced regardless. Our tow vehicle, a 2002 Nissan Xterra (with the supercharged motor) pulled the boat with ease. I anticipate having no problems towing with the other truck, a 1993 Nissan Pickup, although it has less power.
|
|
|
|
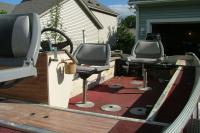
The hull itself is in good condition, although the interior and some of the exterior paint is peeling. The floors are soft, the carpet is faded, and the wiring - though functional - is a mess. The seats are mismatched and need replacement - half because they're worn out and half because I'm picky and want them all to match and fit better than these do.
|
|
|
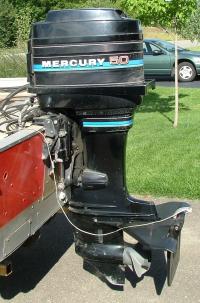
We bought the boat locally in mid-August, and it hasn't been used in approximately four years. The seller ran the motor each fall and we were able to hear it run when we looked at it. At that time it wasn't pumping any water and a quick inspection behind the water intake cover revealed small pieces of the impeller, which had dried out and disintegrated, although it started up and idled very well for the brief time we let it run. The motor has very little paint wear and looks almost brand new under the cover.
|
|
|
|
On the water after installing a new water pump and broken throttle linkage. We can get 26 MPH out of it according to the speedo on the fish finder, 27 MPH according to GPS, and it runs like new after performing a tuning sequence to get the new throttle linkage adjusted properly.
|
|
|
The boat and primary tow rig at the launch - New tires on both.
|

|
|
|
Here's the boat and my other tow rig. Not as much power as the Xterra, but it tows the boat surprisingly well.
I love my Nissans!
|
|
|
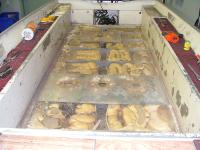
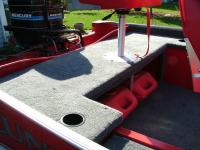
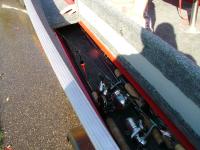
Here's what was under the floor - the floation foam is dry and everything appears to be OK other than 23 years worth of crud. I later found similar conditions beneath the rod storage lockers on the sides. The floors were original to the boat, some very bad but most still in reasonably good condition.
|
|
|
|
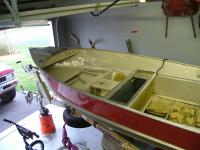
Here's what was under the front deck. Everything is OK here as well. In the process of removing the console I found that the rat's nest of wiring there was for a trolling motor formerly mounted on the bow. When I examined the wiring that was still functioning I was very pleased to find it to be in good condition. I'll replace the switch panel and clean everything up, but the boat won't need to be completely rewired as I had thought. The old flooring and panels are still solid enough to be used as patterns for the new so that part of the project should be straight-forward.
|
|
Next on the agenda is to build a compartment that covers the battery, gas tank, and power tilt pump motor. I plan to box this area in to create a compartment. The center will be fixed and I'll install a seat base there while either side will have doors that open to the top to allow access to the compartment. I'll separate the compartment into two sections, one for the electrical components and one for the fuel tank. Both sides will have vents as well. I'll replace the rest of the flooring and front deck as they were originally.
The steering console will be modified slightly so that I can move it forward a few inches. As it was delivered from the factory the top of the shifter / throttle nearly hits the dash. A few inches isn't much, but it will resolve the clearance problem and will require only very minor modifications. I'll re-use the aluminum frame for the console, but it will be updated with carpeted panels where stained plywood originally appeared. I'll likely change the design, but only slightly.
|
|
|
|
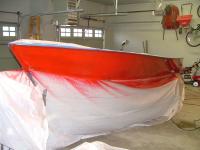
After three primer coats and one color coat. The boat has been repainted by someone along the way and the red wasn't quite right. This red matches the color Lund intended this boat to be.
My garage / paint booth doesn't provide enough light for serious painting. In this case the boat has a fair amount of dock rash and other imperfections so a few sags in the paint aren't a problem - other than that they bother the perfectionist in me.
|
|
|
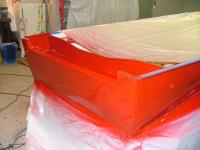
I decided to paint the splashwell as well. It's not how it was painted from the factory, but I like the finished look it provides. I was going to carpet the entire interior, including the console and a few trim pieces throughout. I wasn't planning to go to the trouble of painting the inside of the storage compartments either. After seeing how good the splashwell looks in red I've changed my mind and plan to paint those areas too.
|
|
|
|
Here's the boat and trailer finished. The trailer was wire wheeled and painted semi-gloss black after I replaced the tail lights and wiring, moved the spare tire, and rebuilt the roller assemblies. I installed a flat plank to walk on when launching and loading.
|
|
Here you can see that most surfaces are carpeted, and those that aren't are painted to match the outside of the boat for the most part. You can also see the new matching seats in this view.
All of the plywood was replaced with 1/2" treated plywood. Each panel was cut, test fitted, then allowed to dry out completely. After this I painted on all 6 sides of each panel with porch, deck, and floor paint to seal it up before wrapping the carpet and mounting the panels.
|
|
|
|
A better view of the front casting deck. Under the nearest two hatches is the live well and the rest is storage. You can also see the new trolling motor I installed. It's a 55pd remote steer MinnKota.
|
|
|
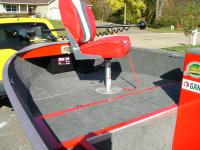
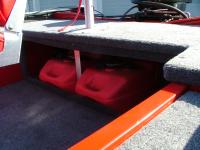
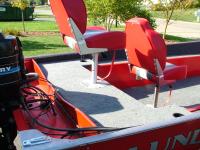
Here's a veiw of the new rear raised casting deck which is mounted above the fuel cans. You can't see it, but the power tilt motor is mounted to their left and the battery is mounted to their right. There is a slight frame around the opening which holds the gas cans in place. I laminated two layers of 1/2" plywood for the top and added the center aluminum strut. There is no sway or flex of the deck or mount when in the seat.
|
|
|
|
Here's another view of the rear casting deck.
|
|
|
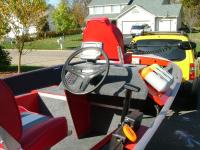
This is the reworked console.
|
|
|
|
Here's another view of the raised casting deck. You can also see the painted splashwell.
|
|
|
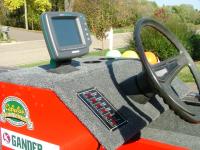
Here's a better view of the console. In this view you can see the new lighted switch panel, a couple of cupholders I added, and the way the top and dash face were reworked. I added some bracing and additional mounting points that really shored the console up.
|
|
|
|
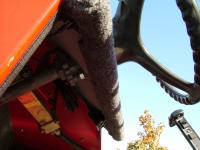
This is a view of the console from underneath. You can see a two-socket lighter power source for use with a handheld spotlight and as a primary power source for my portable GPS. I put this underneath and nearly upside down to protect it from the weather and corrosion. It's also switched from the panel on the face of the console.
|
|
|
Here you see (maybe) what the inside of the compartments looks like. This happens to be one of the rod storage compartments.
|
|
|