|

(Insert New Caption)
|
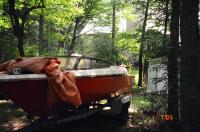
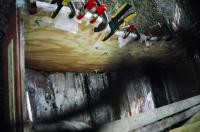
Notice project #2 in the background a Cutter also in need of a transom
|
|
|
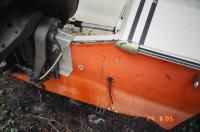
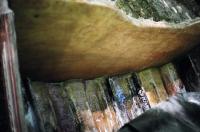
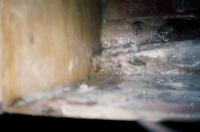
Here's the Steury with the rubrail almost off
|

(Insert New Caption)
|
|
(Insert New Caption)
|
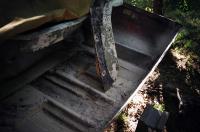
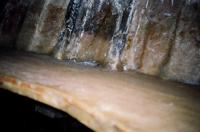
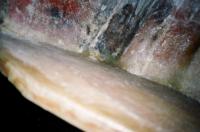
Transom bowing out amd seperating with rubrail off
|
|
|
This side is worse bowing out
|
(Insert New Caption)
|
|
(Insert New Caption)
|
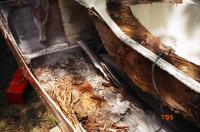
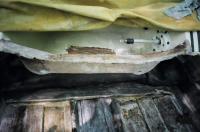
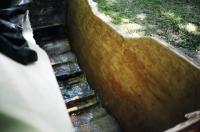
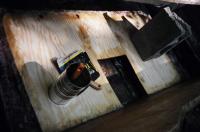
Deck is moved ahead after cutting the glass off around the splashwell at the transom as someone did a hack repair previous to me owning it Motor was hoisted off also old 85 Jonnie 270 lbs
|
|
|
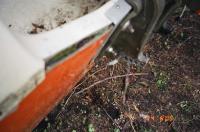
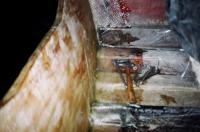
Started digging out the old transom taking my time, as it's a first for me learning as going forsure ,floor in decent shape but floation foam is wet and transom mostly mulch one good spot where the motor was mounted that was the hack fix Only cut 1 foot out of the floor will have to cut another foot and hope floation foam is dry there
|
(Insert New Caption)
|
|
(Insert New Caption)
|
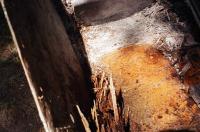
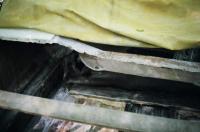
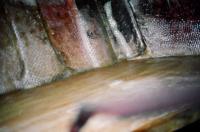
Notice where it was glassed to the splashwell middle top of picture and still stuck on deck splashwell Cut out pieces sitting in splashwell, lots of work ahead to clean up this mess but I will do it right
|
|
|
Extra foot of floor taken out foam is dry here great to find that out. All grinded down useing a 4 1/2 " angle grinder,electric drill with sanding disc,cheisel,and sand paper.Transom is cut out ready to install
|
(Insert New Caption)
|
|
(Insert New Caption)
|
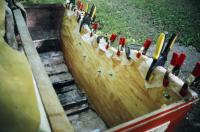
Transom is in clamped and bolted,After debating I went with waxed polyester resin,at this stage it is one layer of mat cloth on the hull ,1/2" fir plywood,layer of mat cloth,1/2" fir plywood.The mat cloth attends on the sides and bottom of the hull approx 6" and 1/2 " over transom top.I used waxed paper so clamps wouldn't be stuck .I had to work really fast a better way would have been to put the layer of mat on the hull and then the first piece of plywood then bolt and clamp,let it cure ,sand and clean then do the next layer of mat and plywood ,clamp and bolt,alot easier if your not the best with fiberglassing ,less stress
|
|
|
Molding the deck as it was all hacked up from a previous fix
|
(Insert New Caption)
|
|

(Insert New Caption)
|
Notice it's all clamped and bolted ,I used 3/8 bolts on motor mounting holes [four] ,2 splashwell drains,2 tow hooks and one bottom drain.If I did it again I would drill a couple of holes lower on each side
|
|
|
Filler was added around the whole transom to fill any gaps,it was a mixture of short strand fiber chop and resin I mixed up. About 500 ml of resin and fiber added
|
(Insert New Caption)
|
|
(Insert New Caption)
|
Crack in splashwell is now fixed ,three layers of cloth and resin
|
|
|
Layer of woven roving on transom,1 foot up transom and 6 " on bottom hull ,foot on sides ot transom and 6" on sides of hull .This was added after filler was grinded smooth
|
(Insert New Caption)
|
|
(Insert New Caption)
|
The woven roving
|
|
|
Final layer of mat cloth covering top of transom and six inches to sides and bottom hull
|
(Insert New Caption)
|
|
(Insert New Caption)
|
All set up awaiting more sanding
|
|
|
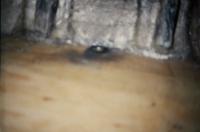
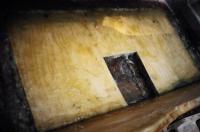
The dark hole is not rot ,it's the bottom drain plug installed.Sort of over did the slow cure 3m 5200 sealant.Glad I had disposable gloves on that stuff is sure messy
|
(Insert New Caption)
|
|
(Insert New Caption)
|
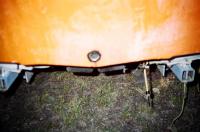
The back has the ring of horrer too,but it won't leak.White sealant would have being less noticeable
|
|
|
Filler being added to stringer gap ends then covered with cloth and resin [filler short strand fiber chop and resin mixture]
|
(Insert New Caption)
|
|
(Insert New Caption)
|
Filler ground down and glassed over
|
|
|
Sort of looks solid now
|
(Insert New Caption)
|
|
(Insert New Caption)
|
Foor put in and filler added around it,used brass screws in stringers and with the help of a block kept things right while it cured
|
|
|
Grinded filler cleaned then added coat of mat cloth and resin,overlapping on other part of floor and on transom
|
(Insert New Caption)
|
|

(Insert New Caption)
|
All cured may add one more coat of mat but I will cut holes first to put in floatation foam [two part pour in foam] then I will put the second layer of mat and resin
|
|