|
|
 |
|
| home |
| |
shopping |
| |
contact |
| |
projects |
| |
Warning: Undefined array key "session_logged_in" in /home2/sap/public_html/header.php on line 612
login | | | join |
|
|
|
|
Kerdi - Walk In Shower
|
 |
|
|
|
|
|
|
|
|
|
|
|
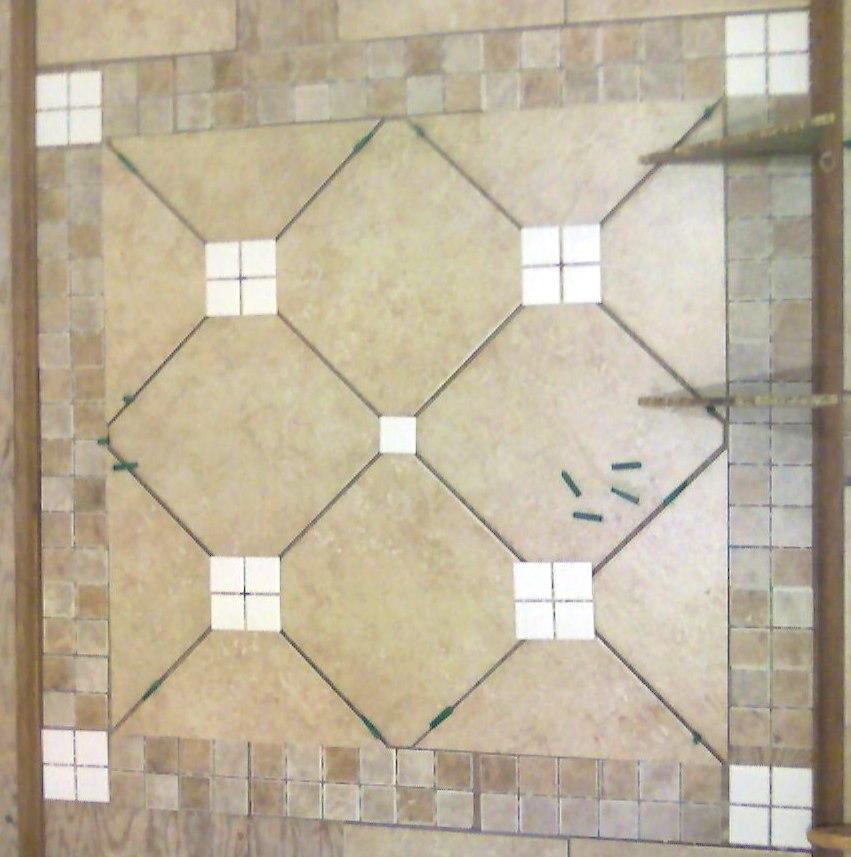
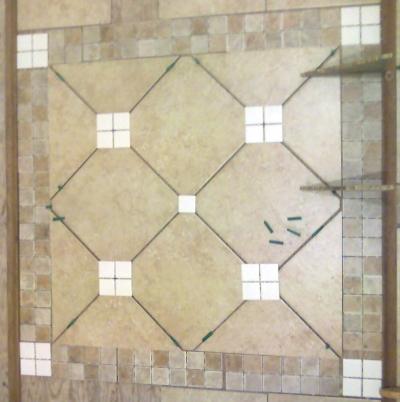
Mosaic Layout for the back Wall
|
|
Well, unless you want the entire shower to be a very boring BROWN all the way around, you need to figure out a way to add some color to the project.
We are already planning to run a border using the floor tile around the center of the walls, but we still thought we needed something extra.
So this is the mosaic we worked out for the back, North wall of the shower. This is composed of the wall tile turned 45 degrees with a border of the floor tile and some white 2 x 2 tile thrown in for good measure.
Taking the advice of John Bridges forum, this entire setup is laid out dry on the floor in the closet BEFORE we start any work in the shower. We tacked a couple of scraps to the floor to simulate the adjoining walls and marked out where this would start on the wall.
We also laid up one row of tile next to this that simulates what the adjoining wall would look like. those two pieces standing up on the top right are soap dish shelves approximately where they would go. They are 1/4 of a 12 x 12 granite floor tile. More on that later.
The challenge in laying this out is not so much the lay out and the cutting, its getting the spacing right. If we installed the 2 x 2 floor tile border with its standard 1/8 inch grout lines, we would have had about 3/4 of an inch of space we needed to fill in in the pattern. We considered putting a 3/4 wide piece of white tile, kind of like a key. Or using some plastic Listle we had previously use in the kitchen, but none of that looked right.
We finally settled on cutting the floor tile, the 2 x 2 chiklet into groups of 4 and increasing the grout space between the groups to the 3/16 inch space used between the other tiles and then the spacing worked out.
|
|
|
|
|
|
|
|
|
All projects on Shareaproject.com are user-submitted and should be used for reference information only. The projects are not intended to be complete "How-To" articles. Use the information contained in these projects at your own risk. Projects are not checked for completion, accuracy, or safety and therefore cannot be guaranteed in any way.
Outdoor Blog
|