|
|
 |
|
| home |
| |
shopping |
| |
contact |
| |
projects |
| |
Warning: Undefined array key "session_logged_in" in /home2/sap/public_html/header.php on line 612
login | | | join |
|
|
|
|
Rebuild Phase
|
 |
|
|
|
|
|
|
|
|
|
|
|
Laminating and glassing the inside skin
|

|
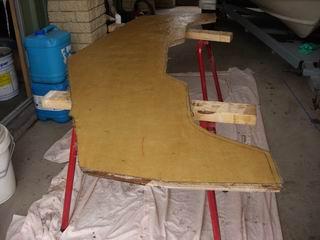
I cut a piece of mat to sandwich between the two pieces. I cleaned both surfaces with acetone and wet one piece of timber with resin. I then positioned the mat on the wet timber and carefully laid the top piece on (making sure it's the right way up and the base angles match). I rammed the screwdrivers into the allignment holes and drove the screws back into their existing holes. I then clamped the pieces together with 8 clamps and I also drilled numerous screws through to pull the timbers togther and ensure no air cavities. In all cases I clamped / screwed just tight enough so that resin and mat oozed out to the edges. The result is two pieces of ply perfectly glued together.
I then cut another piece of mat and applied this to the 'front' surface to the transom and ground off all the dags and runs from the fiberglassing work. The two clices has shifted ever so slightly in the laminating process so i had to do a bit of planing to once again get that perfect fit.
Once I had the perfect fit I traced along the top edge of the transom skin and cut the excess timber off. Again I finished the cuts with a jigsaw along the curves and there the curcular saw blade couldn't reach.
Now to install the new transom . . . . . .
|
|
|
|
|
|
|
|
|
All projects on Shareaproject.com are user-submitted and should be used for reference information only. The projects are not intended to be complete "How-To" articles. Use the information contained in these projects at your own risk. Projects are not checked for completion, accuracy, or safety and therefore cannot be guaranteed in any way.
Outdoor Blog
|