|
|
 |
|
| home |
| |
shopping |
| |
contact |
| |
projects |
| |
Warning: Undefined array key "session_logged_in" in /home2/sap/public_html/header.php on line 612
login | | | join |
|
|
|
|
Rebuild Phase
|
 |
|
|
|
|
|
|
|
|
|
|
|
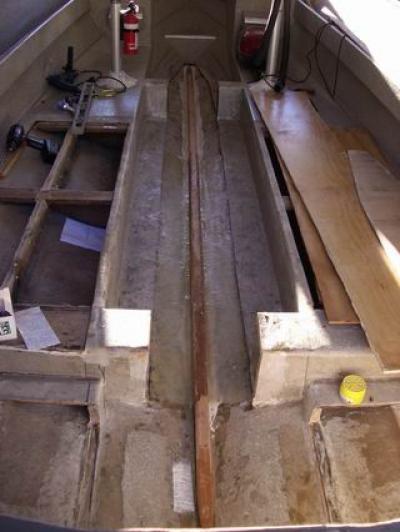
Glassing the stringer in
|
|
Once the keel stringer was made and fitted snugly along it's entire length I was ready to glass it in.
With any structural component it's vital to ensure that there are no gaps or air pockets as any stress will be concentrated on this area and could result in cracking (at best). Fortunately the keel of the boat is a 'v' shape so I was able to use plenty of resin as it would only pool under the stringer ensuring good contact all the way along.
I cut two thin layers of mat to run under the stringer and these absorbed resin like a sponge also improving the integrity of the join. After cleaning all surfaces with acetone and with the mat wet through I laid the stringer and weighed it down with my next door neighbours weights which I 'borrowed' from his benchpress when he wasn't home.
Once dry I cut 30cm wide strips of mat and dry fitted them so they ran along the bottom of the boat then up the stringer until level with the top. With all my kit ready to go I brewed a batch of resin and strated glassing the stringer in. I used 3 layers of mat and it took around 5 batches of resin to get it all in.
Next I ground all the dags where the mat protruded higher than the top of the stringer.
|
|
|
|
|
|
|
|
|
All projects on Shareaproject.com are user-submitted and should be used for reference information only. The projects are not intended to be complete "How-To" articles. Use the information contained in these projects at your own risk. Projects are not checked for completion, accuracy, or safety and therefore cannot be guaranteed in any way.
Outdoor Blog
|
