|
(Insert New Caption)
|
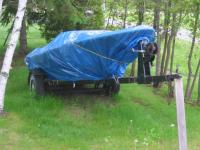
This is how the boat was stored for the last two years. For the first if those two years it had a smaller tarp which showed part of the bow and probably damaged the metalflake beyond recovery where it was exposed (we'll see).
|
|
|
Welcome to Cottage Country
|
(Insert New Caption)
|
|
(Insert New Caption)
|
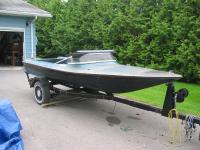
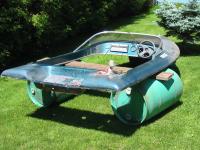
Here's what the whole boat looks like. It's about 15' long. Supposedly a Thundercraft Wildcat. I've seen others for sale called the same. It's small, very shallow and normally runs with a Merc 850 (85hp) on it. Fast enough to be fun but not really dangerous. I have had it airborne off of a wave once (suprised me when it happened, not intentional)
|
|
|
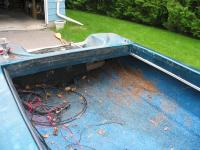
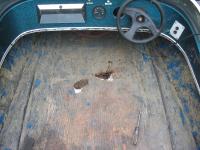
Gives an idea of pre-work condition. I wonder what that chewed up wood looking stuff could be?
|
(Insert New Caption)
|
|
(Insert New Caption)
|
THEM!
|
|
|
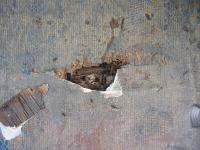
The soft spot in the floor is the result of a carpenter ant colony. I wish I had shots when I pulled up the first board; it was a horror show, but I was too busy with the shop vac and wrecking bar, trying to remove floor and suck up all the thousands of ants at the same time. It was about then I decided, rotten or not, anything made of wood was coming out.
|
(Insert New Caption)
|
|

(Insert New Caption)
|
Play Safe
|
|
|
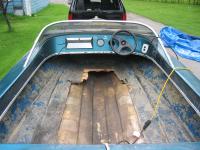
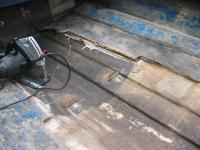
Most of floor out. Imagine my releif to see no stringers and no evidence of previous stringers. The surface of the hull in the bilge was all as it was laid up in the factory. No ground off spots or repairs indicating that someone else took out stringers and didn't put them back.
|
(Insert New Caption)
|
|
(Insert New Caption)
|
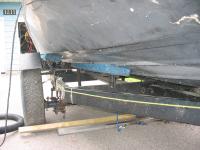
The boat is so small, it's really well supported by the trailer. I added some blocking under the keel just to be sure. Probably a very minimum chance of any deformation problems, especially since I don't have to take out any stringers.
|
|
|
These two little tabs were the only thing I found in the bilge. They look original. The only thing I can guess they would be is an aid for factory workers to help install the floor. Maybe there was a joint in the floor boards around these? I left them there.
|
(Insert New Caption)
|
|
(Insert New Caption)
|
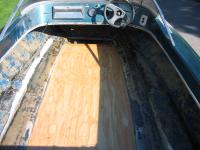
the first portion of floor was laid in with the deck still attached to ensure no deformation problems in the hull. Only the first layer of cloth on here.
|
|
|
After a morning of drilling rivets and removing the rub rail, the deck comes off. This deck has been off before. It's a shoebox joint with the hull, and the flanges look like swiss cheese.
|
(Insert New Caption)
|
|
(Insert New Caption)
|
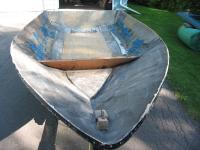
One hull, less a deck. That board sticking up there is either a foot rest or a bulkhead. The plywood was not even remotely fit well to the hull. There's at least 1/8 to 1/4" gap at each side. It's tabbed on with a patch of chopped strand at each side. I'm putting it back because I figure it adds some lateral stability.
Everything including and forward of that footboard in this picture hasn't been wrecked out yet.
|
|
|
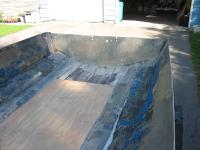
Transom wood was rotten, came out fairly easily. Front 1/4 of the floor seen above came out. Including screw holes there was about 30 holes through the transom. Previous owners did stupid things like taking the line for the spedo out by drilling a hole in the splashwell, then drilling a hole in the transom anyhow instead of going up and over the transom.
|
(Insert New Caption)
|
|
(Insert New Caption)
|
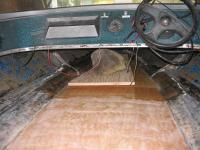
Front section of floor went in. I should note that all the floor boards are bedded in West System epoxy thickended to almost a peanut butter thickness, then the gaps are faired witht he same stuff. If you look two images up you'll notice where the floor comes to a point at the front of the boat. I had a tiangle of thickened epoxy in there which was more in one spot than you should have. It got quite hot, and when I thought I saw it give off a whisp of smoke, I spent the next 1/2 hour holding ice against the outside of the hull. Don't put too much thickened epoxy in one place.
The deck was set back on while the floor cured here, just to ensure there were no problems putting it back on later and to minimize the chance of any hull deformations.
|
|
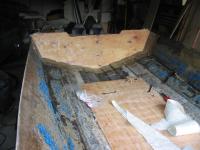
Front section of floor in. Transom partly cut and fit.
If you look really closely you may see a white triangle at the front of the floor. That's the chunk of thickened epoxy I thought was going to catch my boat on fire. I'm paranoid.
|
(Insert New Caption)
|
|
(Insert New Caption)
|
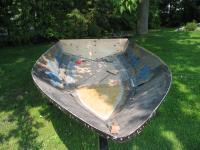
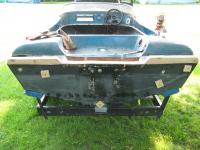
Part of the transom test fitting process. Whoever did work on the boat last butchered the hull/deck joint at the transom and hid it with the rub rail. I've decided to extend the transom up into the deck past where they cut it away. I will still have to cover the gap with the rub rail, but it think it will be better construction. At least the top of the transom will be restrained by the deck as well as it's own stiffness.
|
|
Transom glassed in with chopped strand mat and woven roving lapped onto the hull about 6". The inside of the hull was coated with thickened epoxy, chop, then the wood, then the roving. I used two layers of 3/4 select grade sanded douglass fir plyood coated twice with epoxy. That matched the flange at the back of the splashwell (motor mount area). The transom I took out was three layers of 3/4 plywood and I think is why they decided to butcher the back of the deck and put the boat together wrong.
Incidentally, any reports I read said that you couldn't use chopped strand mat with epoxy because it has a binding agent in it that dissolves in the catalyst for polyester resin but not in epoxy. I did a test before I laid up my transom and had no problems wetting out the chop. I think it depends on what kind of chop you buy. I bought my chop, cloth and roving from a marina from their supply of materials they use to do fibreglass repair. They had a good selection of the weights I needed and the price was similar to ordering online except I could walk away with it in hand.
|
(Insert New Caption)
|
|


