|
The Begining
|
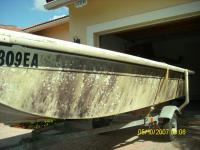
This is the boat when I got it. It had been sitting in a yard for about 12 years.
|
|
|
There was actually plants growing out of the foam parts of the hull.
|
Before cleaning
|
|
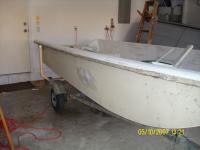
Boat after cleaning
|
Boat after being power washed and scrubbed.
|
|
|
Boat after most of the plant life and mold was removed from the hull.
|
Cleaned up
|
|

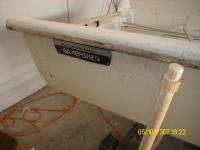
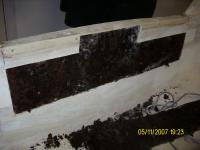
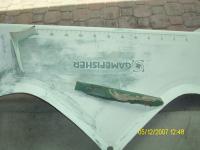
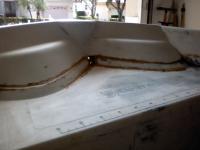
Transom
|
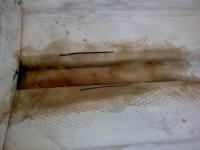
The Transom had two holes through the top layer of fiberglass from where the original outboard sat. Top layer of fiberglass needs to be removed to replace transom wood.
|
|
|
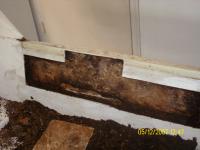
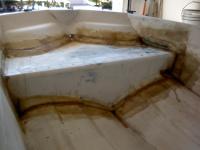
The transom was completely rotted. I cut the top layer of fiberglass away with a dremal tool so I could remove all of the rotten wood.
|
Transom
|
|
Transom 2
|
The wood was so rotted that I ended up scraping most of what was left out with a paint scraper.
|
|
|
Before sanding I had to pull all of the trim off as well as all the hatches and hinges.
|
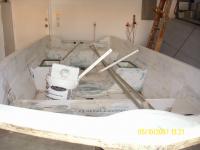
Before sanding
|
|
Bow
|
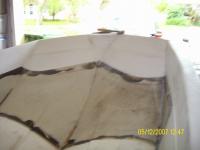
The Bow decking was cracked and the glue had begun to let go. So I removed the decking to do the fiberglass work underneath it.
|
|
|
I removed the bow section of the decking and will be doing all the fiberglass work separately on the decking before putting it back in the boat.
|
Bow Removed
|
|
Starting Electrical Work
|
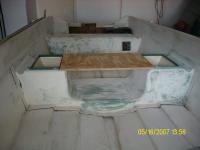
I cut out a rectangle shaped piece of the rear bench seat where my switch plate will be mounted. I also removed some of the foam to make space for the wiring.
|
|
|
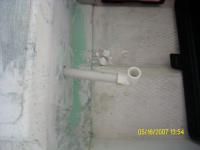
I cut a piece of PVC pipe to run the width of the bench seat which will be used as a housing for all of my electric wires. I then drilled a hole roughly the diameter of the PVC in the opposite side of the bench that my switch plate will be mounted and with some elbow grease pushed the PVC pipe through the foam to the other side.
|
Electrical Work
|
|
PVC
|
Once the PVC was all the way through, I had to clear the pipe of all the foam that was stuck inside with a shop vac and it was ready for wires. I will not be running the wiring yet because I'm still deciding where my depth finder will be placed but once I do that I will use silicone to seal the pipe and keep the wires dry.
|
|
|
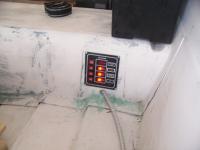
I test fit the switch plate to make sure that everything will fit behind the plate and once all my wires are run I will use stainless steal screws and some marine grade silicone to finish the job.
|
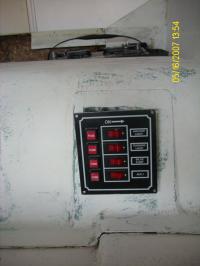
Switch Plate
|
|
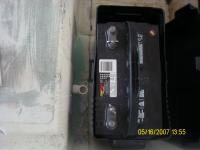
Battery
|
Checked to make sure the battery fit where I wanted it to go.
|
|
|
I measured and cut wood for the front bench seat that was missing when I got the boat.
|
Front Bench Seat
|
|

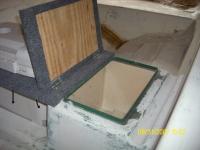
Live well
|
I cut out the center bench seat to fit the live well. I'm using an old cooler that I cut down to fit as the actual tank. I kept the handles on the cooler so it can be removed for cleaning.
|
|
|
I ran power to the live well from the switch plate that will run a submerge-able aerator.
|
Live well cont.
|
|
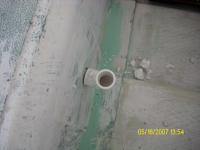
Power
|
I ran power to the live well from the switch plate inside plastic flex tube, to keep the wires dry and protected
|
|
|
The Flex tube will be hidden underneath new floor once it is put in.
|
Cont.
|
|

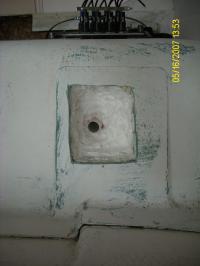
Transducer
|
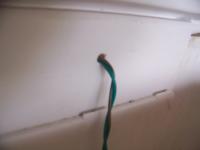
I mounted the transducer for the depth finder, and drilled out the hole for the wiring to run. I made a plug for the hole which I didn't get a picture of but the wire runs through the middle and it will be sealed in with silicone once the boat is painted
|
|
|
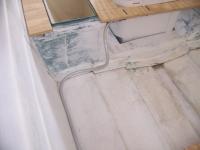
This is the rear of the boat with the mess of wires that are currently just hanging out at the moment. You can kind of see the plug I made for the transducer wire its the green circle around the wire.
|

more wiring
|
|
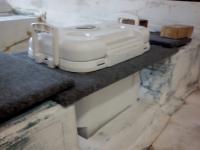
Depth Finder
|
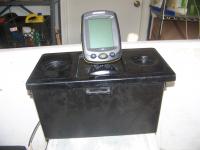
I was struggling to figure out where to put the depth finder because the boat does not have a center console. I decided the only effective place to put it is on the rear bench, but it was too low to just mount it to the seat. So I built a storage box using an old battery box and one of the old hatches from the front.
|
|
|
I found some cleats in a clearance bin when shopping and for 1.00 a piece they will work perfect.
|
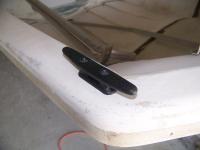
Cleats
|
|

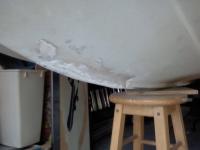
New transom
|
New Transom is in. I used Marine Grade 2x4's to make the transom an extra 1/2 inch thick first I glued them in place with a product from 3m which was a heavy duty marine sealant. They will be glassed in once the fiberglass work is started.
|
|
|
using the same marine sealant from 3M I glued the front deck back in place which will also be glassed in. It was a bit trick to get clamps on because of the angles, so I used spare plywood to make braces and some bricks to add weight.
|
Front Deck
|
|
Hull
|
Started sanding/grinding the old patch that was on the boat when I got it. Someone had used bondo to fix a small crack and just made a mess with it and it started pealing and cracking off. so it had to go so the crack can be made solid again with fiberglass and resin.
|
|
|
Got the Front bench and hatches carpeted. (the bricks in the background were from the front deck) I used indoor out carpet that i got from Lowes for about 2.00 a sq. foot. glued it first the followed with stainless steal staples.
|
New front bench
|
|
hatches
|
hatches installed.
|
|
|
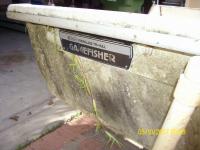
I sanded both name plates, which will be repainted to match the color scheme of the new paint.
|
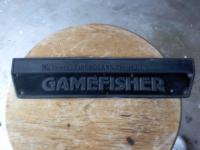
Name Plates
|
|

Name Plates
|
name plates painted and ready to go back on after the hull is painted
|
|
|
Fiberglass work started, front deck glassed in.
|
Finerglass
|
|
Finerglass Cont.
|
Patching up some problem areas.
|
|
|
Transom glassed in.
|
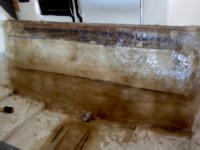
Transom
|
|
Trailer
|
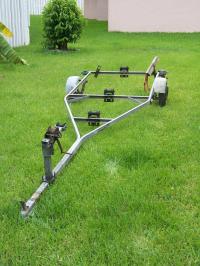
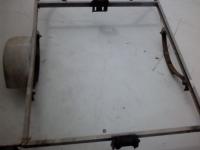
This is the trailer that came with the boat. It's hard to see but it needs a lot of work. just about everything except the frame needs to be replaced.
|
|
|
Another before picture.
|
Trailer Rear
|
|
Trailer work
|
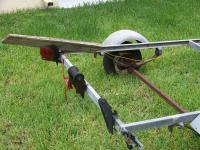
This is the jack that was on the trailer when I got it. I Removed almost all the hardware from trailer frame to start over, including the winch, the lights, the rollers, the tires, and the trailer wiring.
|
|
|
New Jack on the trailer.
|
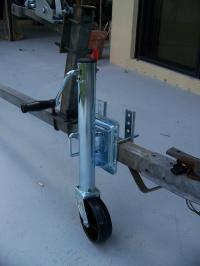
New Jack
|
|
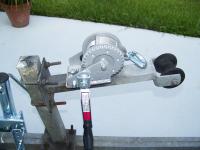
New Winch
|
New winch on trailer.
|
|
|
New trailer lights. I was going to go with LED, but limited budget made the decision sway the other way.
|
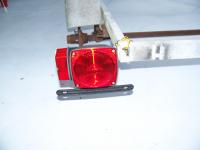
Trailer Lights
|
|
Trailer
|
Using the cutting bit on the dremel tool, I cut the axle off the trailer.
|
|
|
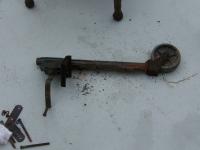
Old trailer hardware that I stripped, it was all rusted and definitely not safe.
|
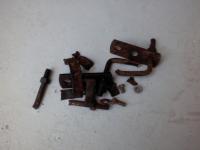
Trailer hardware
|
|