|
|
 |
|
| home |
| |
shopping |
| |
contact |
| |
projects |
| |
Warning: Undefined array key "session_logged_in" in /home2/sap/public_html/header.php on line 612
login | | | join |
|
|
|
|
1967 Starcraft
|
 |
|
|
|
|
|
|
|
|
|
|
|
Submitted By:
|
gunner1
|
|
Date Created:
|
10-14-2007
|
|
Description:
|
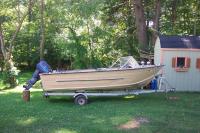
Back in August I bought a 1967 Starcraft 16' aluminum hulled boat. It came with a trailer, the 50 horsepower Force on the transom plus an additional 50 horsepower Force all for $350. The first thing I did was to replace the old lighting on the trailer with an Optronics LED kit, which for $50 is a VERY good kit that was also very easy to install. Next I set to work replacing the bearings in the hubs. Well, much to my surprise, the wheels were held on with trough bolts with nuts and washers on the back side! This wouldn't do so I decided to change both hubs. Of course I had a "unique" situation in that all three brands of hubs I tried wouln't fit properly. The outer bearing was right at the end of the spindle. So I ended up ordering two new " short hubs " from thr trailer superstore along with a set of matching rims and tires. On the motor side of things, everything was okay except for one of the plugwires had a crack in the boot. Since you can't just replace the wire (again, much to my surprise) I fixed that with several coats of liquid eclectrical tape. I also filled the lower unit with lube since a quick check revealed none. I then test ran it only to discover no water coming out the back. This led me to replacing the water pump a couple of weeks ago and installing a tell on the top of the head. I fueled up the gas can with fresh gas and oil and added an entire can of Seafoam to clean it out. I only got to run the motor a little while until this weekend. I put a half of a 55 gallon plastic drum under the lower and fill it with water to run the motor some. Let me tell you, when you hear people talk about how Seafoam causes engines to smoke alot- believe them! I thought something was wrong so I turned it off and posted a question over at the www.iboats.com forums and was told that the smoke was definately caused by the Seafoam. So after having my confidence restored, I decided to begin with the floor removal, which is where I am now. Here are some pics of my boat as received and the little bit of floor progress I've made. I'll post more as I go along.
|
|
Tools / Materials:
|
Go to the Boating Store
|
|
|
(Insert New Caption)
|
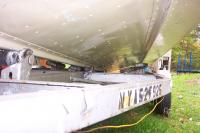
Day I brought her home.
|
|
|
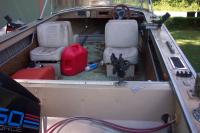
Interior as it was on the day I got it.
|
(Insert New Caption)
|
|
(Insert New Caption)
|
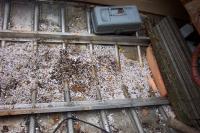
(Pic of the bow area with the floor removed. That foam's gotta go!
|
|
|
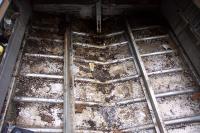
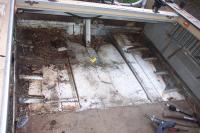
Pic of the stern with the floor removed. That foam REALLY has to go!! Some of this stuff was so wet it was literally dripping when I took it out.
|
(Insert New Caption)
|
|
(Insert New Caption)
|
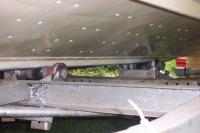
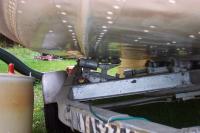
Trailer needs new keel rollers BADLY!
|
|
|
Trailer is going to be converted to bunks. As you can see in this pic and the one that follows, the boat doesn't sit right on these rollers and the conversion is easy enough.
|
(Insert New Caption)
|
|
(Insert New Caption)
|
(Insert New Description)
|
|
|
These holes are need fixing too.
|

(Insert New Caption)
|
|
(Insert New Caption)
|
Good pic of the floor removal process. The wood back by the transom was shot for the most part due to the foam being saturated. The rest of the floor was probably ok, but I prefer to not do things half-assed, especially since I had all the carpet and the old seats out anyways.
|
|
|
|
|
|
|
All projects on Shareaproject.com are user-submitted and should be used for reference information only. The projects are not intended to be complete "How-To" articles. Use the information contained in these projects at your own risk. Projects are not checked for completion, accuracy, or safety and therefore cannot be guaranteed in any way.
Outdoor Blog
|