|

(Insert New Caption)
|
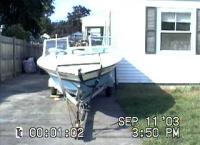
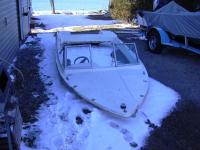
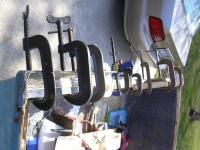
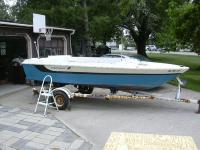
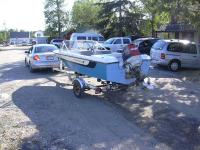
As found, October 2003, in Rhode Island. Found the boat in eBay and talked the wife into a weekend road trip. Came with a blown Chrysler 85hp that I parted out for enough money on eBay to cover the cost of the boat & trailer, plus most of the road trip gas money!
|
|
|
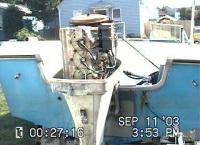
This is the Chrysler that came on it. It is actually bowing the transom inwards - very little structure left under the glass skin.
|
(Insert New Caption)
|
|
(Insert New Caption)
|
The windshield is missing the center section. Not a bad little trailer, though!
|
|
|
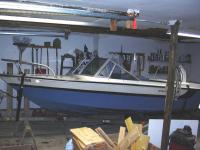
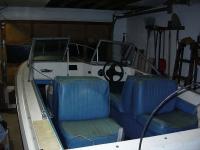
She's home and in our garage. Pretty sharp looking boat!
|
(Insert New Caption)
|
|
(Insert New Caption)
|
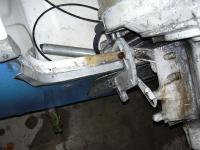
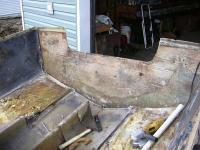
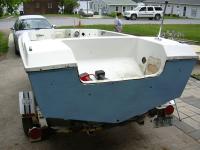
Here you can see the warping of the transom due to the weight of the motor. Someone had even tried to add fiberglass reinforcement to the transom - a complete waste of time...
|
|
|
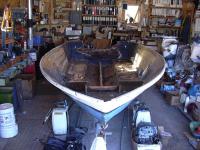
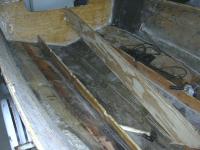
The interior doesn't look too bad at first glance, but all the wood under the seats and vinyl trim is rotted.
|
(Insert New Caption)
|
|
(Insert New Caption)
|
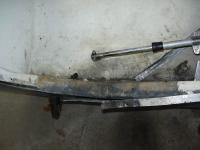
Got the motor off and you can really see how bowed out the transom is. It should be straight across!
|
|
|
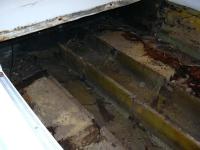
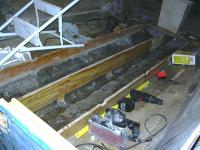
Let the gutting begin! The floor is completely rotted and the foam flotation is saturated. Ended up taking out about 400 lbs. of wet foam.
|
(Insert New Caption)
|
|

(Insert New Caption)
|
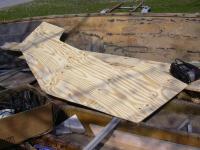
Buckets, and buckets of wet foam...
|
|
|
The clean-up continues....
|
(Insert New Caption)
|
|
(Insert New Caption)
|
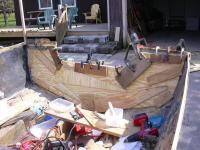
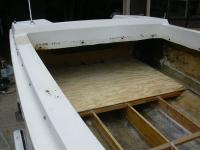
March 2004. We pulled the deck off to gain access to the transom and innards.
|
|
|
She's topless!
|
(Insert New Caption)
|
|
(Insert New Caption)
|
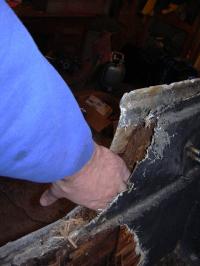
The transom is pretty well toast - as was quite obvious before I even got a good look at it...
|
|
|
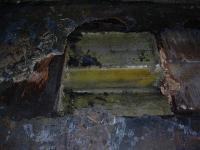
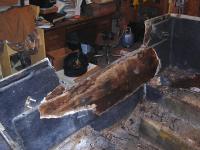
The plywood between the inner and outer skins of the transom is pretty much mulch.
|
(Insert New Caption)
|
|

(Insert New Caption)
|
March 2005. Getting it cleaned out. Slowly... A year has gone by as I had to vacate the shop for another project.
|
|
|
There we are! The transom skin is now clean and ready for new wood!
|
(Insert New Caption)
|
|
(Insert New Caption)
|
Mrch 2005 - A new piece of transom! On this boat I used three layers of 1/2-inch plywood to achieve the 1.5-inch thickness. Alternating plywood with glass cloth to act as a wick for the epoxy. I taped a large sheet of newsprint to the outer skin of the transom to create a template, then trimmed to fit. It didn't need to be perfect as the epoxy tends to fill gaps quite well.
|
|
|
Lots of clamps. Lots of epoxy. Lots of screws (temporary).
|
(Insert New Caption)
|
|
(Insert New Caption)
|
Back view of transom going in...
|
|
|
Did I mention that I used a lot of clamps?
|
(Insert New Caption)
|
|
(Insert New Caption)
|
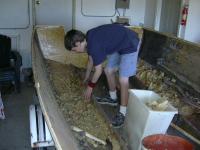
My son gets into the clean-up as we move on to getting the stringers and keel out and new ones in. The last of the foam has to come out first!
|
|
|
The stringers are in and the keel is now out. I did them one at a time so that the hull wouldn't get distorted too much. The stringers and keel are made out of a laminate of two layers of 1/2-inch plywood with a layer of glass cloth between them. West System epoxy acted as the glue.
|
(Insert New Caption)
|
|
(Insert New Caption)
|
Rough fitting the new keel.
|
|
|
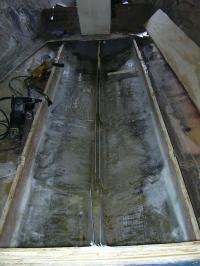
The new keel is tabbed in and good to go! The boat is MUCH more solid now. The original keel and stringers came out in pieces. Split in areas and rotted in others.
|
(Insert New Caption)
|
|
(Insert New Caption)
|
June 2005. I've told my wife we'd have the boat in the water for 4th of July weekend - in time for the local fireworks display. Well, it is mid-June and the deck is now back on. It's starting to look like a boat again!
|
|
|
I patched the hole in the side of the motor well where the previous owners had cut out for the Chrysler's steering cable. The 1980 Johnson 75hp I will be putting on it will not need such a big hole.
|
(Insert New Caption)
|
|
(Insert New Caption)
|
I wanted to get the deck back on first as I didn't want any outward sag that the hull may have taken with the deck off to become permanent when I tabbed the floor to the sides. The deck pulled the sides together a good 2-inches. First section of floor goes in nicely.
|
|
|
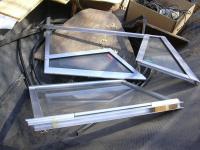
As I noted earlier, the windshield was missing the center swing out section, and the side wings were in rough shape. I asked my local Starcraft dealer if he might have any used windshields off a junker and it turns out he had BRAND NEW parts on the shelf!
|
(Insert New Caption)
|
|
(Insert New Caption)
|
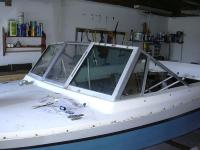
She looks a lot better with the windshield in place, doesn't she?
|
|
|
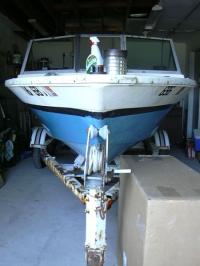
Lots of elbow grease at this stage. I am rubbing out the sides with rubbing compound, followed by a good waxing. You can see the difference between the two sides... The big box in front contains the new seats! Whooohooo!
|
(Insert New Caption)
|
|
(Insert New Caption)
|
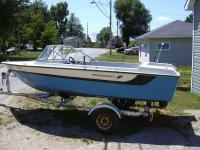
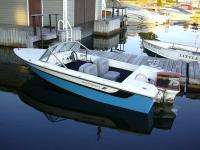
The rub rail is back on, the sides are shined up, the stripes are touched up, and she's ready for rigging!
|
|
|
And we're ready to get her wet! The motor is a 1980 Johnson Stinger 75 (with a 1976 hood) that came off the previous A15. I rebuilt it in 1995 for yet another boat I had at the time...
|
(Insert New Caption)
|
|
(Insert New Caption)
|
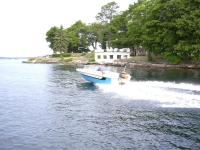
She runs about 40mph and looks pretty sharp doing it! The shakedown cruise also involved a large cruiser wake that I hit pretty hard. Not so much as a quiver as the boat landed after jumping free of the water for a good 15-feet! Gotta love a rock-solid ride...
And did I mention, it is July 2, 2005 - two days before my self-imposed deadline!
|
|
I really love the looks of this boat. Very classic lines.
Plus, I found out later that the hull was designed by one Waltman B. Walters, a marine architect who designed many ocean racers back in the 1960s and 1970s. That pedigree shows up nicely as a very smooth ride in a moderate chop for a small boat.
|
(Insert New Caption)
|
|