|
(Insert New Caption)
|
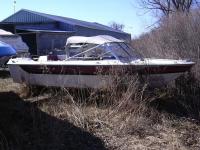
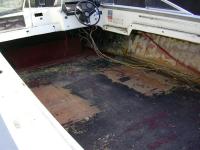
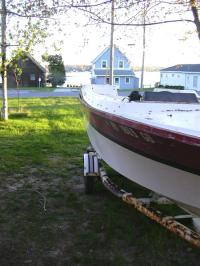
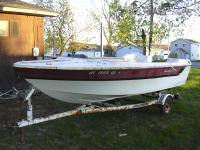
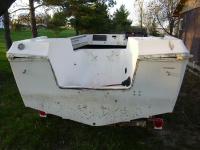
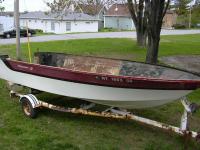
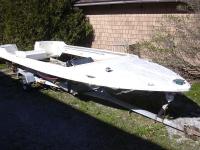
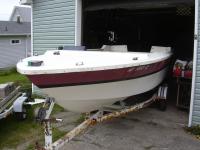
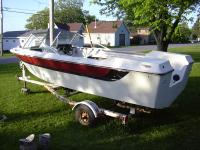
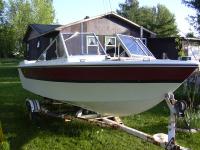
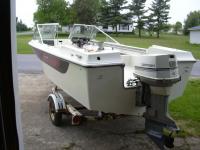
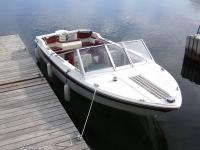
April 2005. This is our new boat as we found her on the back lot of a local marina. It is a 1976 Starcraft American 18-footer. It is a fiberglass hull with wooden transom, stringers and floor. The full canvas was a selling point as I figured if nothing else I could keep that for another boat down the line. Doesn't look too bad from a distance, does it?
|
|
|
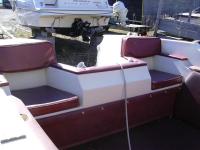
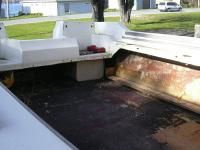
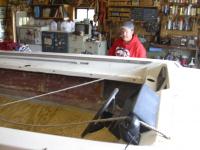
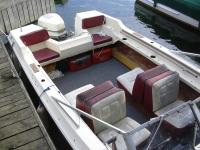
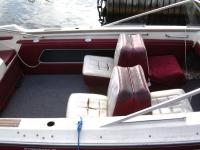
The rear seats don't look too bad. Appears that someone has done some vinyl work at some point as these would have received the worst of the weathering over the years.
|
(Insert New Caption)
|
|

(Insert New Caption)
|
The back-to-back seats are more or less solid, but the vinyl is showing its age. We decide to use them for now and have them recovered later rather than simply replacing them. Having friends who do vinyl work helps with this decision!
|
|
|
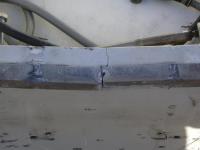
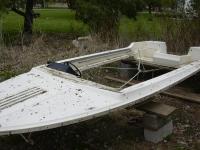
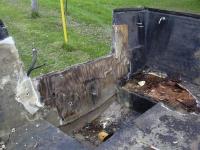
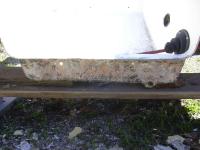
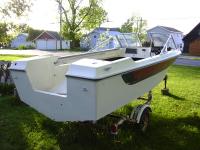
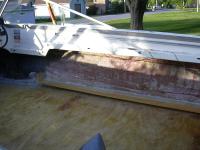
Okay, so there were more pressing issues. The transom was cracked and bowed out a bit. Definitely needs to come apart.
|
(Insert New Caption)
|
|
(Insert New Caption)
|
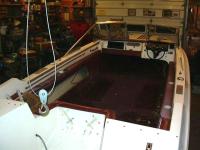
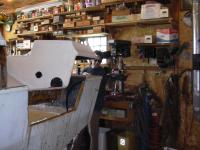
November 2005 - Let the games begin! The process of assessing the boat has begun. The seats are out and we start pulling the side panels and teak trim off. Also remove a lot of the little doo-dads that were added over the years. I don't need the rocket-launcher style rod holders - end up getting a couple bucks for them on eBay! Bonus!
|
|
|
April 2006 - Some other projects got in the way of getting much done over the winter but I start anew in the spring of 2006. The interior is pretty much gutted and the floor is exposed.
|
(Insert New Caption)
|
|
(Insert New Caption)
|
Another shot of the gutted interior.
|
|
|
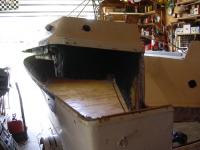
May 2006 - The windshield and rub rail are off. Now to get the deck off so we can get at the transom and all of the floor.
|
(Insert New Caption)
|
|
(Insert New Caption)
|
The deck is loose most of the way around. Most of the screws that held the deck to the hull snapped when coming out, so many were drilled out. They used STEEL screws so all of them are rusted to some degree.
|
|
|
The transom area is the bugger. Parts are loose due to the rotted plywood undereneath coming apart. Other parts are still glassed together. Patience and some brute force wins out eventually.
|
(Insert New Caption)
|
|
(Insert New Caption)
|
And voila! The boat is topless!
|
|
|
Here you can see the 4-point harness I made up to lift the deck off using a come-along. Looks kinda like a Flinstone boat...
|
(Insert New Caption)
|
|
(Insert New Caption)
|
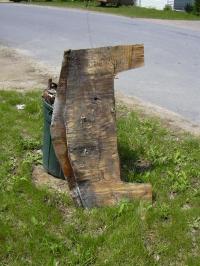
As suspected, the transom and floor were a mess. Lots of rot...
|
|
|
... and the cause is SATURATED FOAM! Lots of it! I end up tossing about 400 lbs. of it in the trash!
|

(Insert New Caption)
|
|
(Insert New Caption)
|
Along with the rotted and saturated transom which must have weight about 100 lbs. on its own!
|
|
|
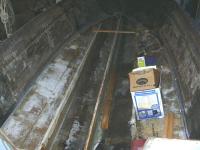
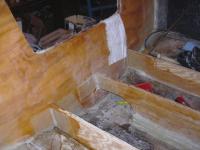
Starting to clean up the transom area. I cut out the last foot or so of the two outside stringers (well rotted!) to give full access to the transom. Lots of belt sanding and grinding to come...
|
(Insert New Caption)
|
|
(Insert New Caption)
|
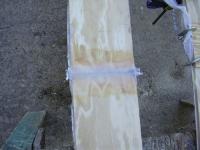
I made my stringers and keel out of 1/2-inch plywood sheets. Being that the keel measured in at about 14-feet long and plywood generally comes in 8-ft. sheets, I laminated up my own to length. I butt jointed the plys and staggered them at 4-ft. intervals. I also dished the butt a bit with a belt sander, then reinforced the joint with alternating layers of matt and cloth. VERY strong!
|
|
|
Lots of clamps used in my laminations. I also used a layer of cloth between the plys to act as a wick for the epoxy so it doesn't all get spooged out when clamped. The planks end up about 1-inch thick when done.
|

|
|
(Insert New Caption)
|
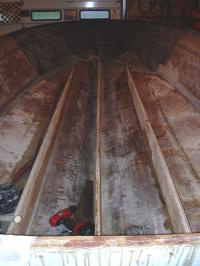
Getting the new stringers seated and fitted. I left a lip from the original glass in place to act as a guide and then glassed over everything with several layers of matt and cloth. Boat is VERY rigid now!
|
|
November 2006 - The new transom is in, as are the new stringers! Can't seem to find any photos in between this and last set from summer. I know I took some and if I find them I'll add them later.
The transom is laminated from 2 sheets of 3/4-inch exterior plywood. I used West System all the way through the process, with fiberglass roven woving and cloth to reinforce seams and joints.
|
(Insert New Caption)
|
|
(Insert New Caption)
|
A view of the stringers in place.
|
|
|
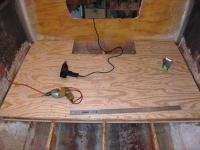
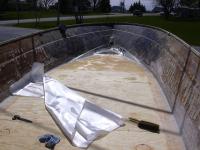
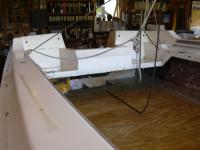
May 2007 - Sporatic work over the winter, limited by some house projects getting into my boat budget. Anyway, here is the new floor going in. Using 1/2 inch exterior plywood, sealed with epoxy all the way around. Held down with stainless screws.
|
(Insert New Caption)
|
|
(Insert New Caption)
|
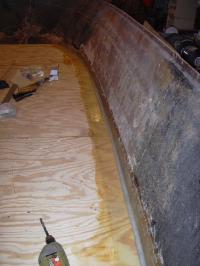
Tabbing the edges of the floor to the sides. Used two layers of glass cloth with a layer of roven woving in between for strength.
|
|
|
The floor is all the way in, getting ready for the glass cloth to give it some abrasion resistance and tying it into the sides.
|
(Insert New Caption)
|
|
(Insert New Caption)
|
Floor is more or less glassed in now.
|
|
|
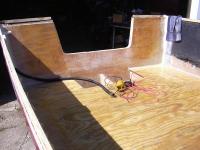
I glassed in a wooden block to attach the bilge pump base. Figured I'd do this before putting the deck on. Occasionally I actually manage to think more than one step ahead!
|
(Insert New Caption)
|
|
(Insert New Caption)
|
Also installed a new drain plug while I had access to both sides.
|
|
|
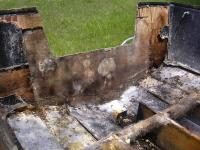
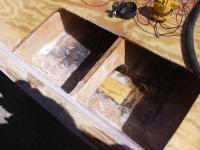
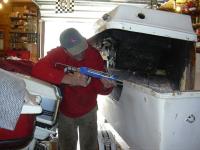
Cleaning up the inside skin of the transom well - it had bits of rotted transom core stuck to it, plus lots of jagged fiberglass chunks.
|
(Insert New Caption)
|
|
(Insert New Caption)
|
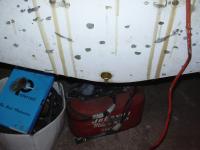
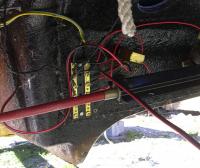
While the deck is off I decided to rewire everything. I had to rebuilt the bow light and clean a spider nest out of the horn, but it all works! The neighbors thought I was a bit nuts when I stood in the middle of the bottomless boat and honked the horn and flashed the lights as they walked by...
|
|
|
Got rid of a rats nest worth of wires and installed a brass terminal block. MUCH neater now and a lot easier to add things later.
|
(Insert New Caption)
|
|
(Insert New Caption)
|
Still May 2007 - getting a lot done now! With some help from my cousin and my wife we back the hull under the deck and start putting it all back together!
|
|
|
Almost ready to drop it! This is my cousin running a bead of 3M 4200 along the seam to seal it up.
|
(Insert New Caption)
|
|
(Insert New Caption)
|
That's me, running a bead of sealant down the other side.
|
|
|
Again you can see my 4-point harness. Much easier than trying to do it by hand!
|

(Insert New Caption)
|
|
(Insert New Caption)
|
It appears to fit!
|
|
|
I used stainless screws to fasten it all back together again. The screws run through the outer lip of the deck, through the inner lip of the hull, and drive into a backing plywood strip on the inside of the hull. It goes together kind of like a shoe box.
|
(Insert New Caption)
|
|
(Insert New Caption)
|
Did I mention that I used LOTS of screws? About 100!
|
|
|
And voila! It's all one piece again!
|
(Insert New Caption)
|
|
(Insert New Caption)
|
Late May 2007 - The windshield is now on!
|
|
|
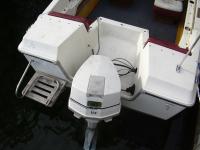
And the transom has been cleaned up of all the epoxy dribblings and repainted!
|
(Insert New Caption)
|
|
(Insert New Caption)
|
I also glassed in new shelf bases for the side panels.
|
|
|
I've also been spending a few apare moments rubbing out the sides. First I wet sanded with 600-grit sandpaper, followed by some rubbing compound, and finished with some marine wax. Starting to look pretty!
|
(Insert New Caption)
|
|
(Insert New Caption)
|
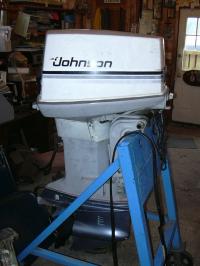
I bought this 1984 Johnson 90hp from a local auction for $50.00, complete with a 1980s era Sea Sprite tri-hull. It needed the powerhead rebuilt and the lower unit was missing, but I ended up selling the boat for $400 which gave me some seed money to get it going. I had the block rebored and installed .030 oversize pistons, found a lower unit on eBay and voila - brand new motor!
|
|
|
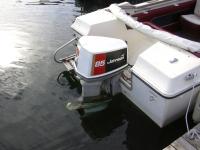
June 2007 - Okay, now we're getting serious! We got the motor mounted! It's a 1984 Johnson 90hp that I rebuilt in 2006 with new pistons, rings, seals, bearings, etc. Looks sharp!
|
(Insert New Caption)
|
|
(Insert New Caption)
|
Another shot of the engine. Also hooked up the steering, mounted the power trim solenoid box, and ran the cables for the throttle box.
|
|
|
She's not quite finished yet, but summer is here and the water is looking good! We get the base carpet in, install the rear seat cushions and set the old seats in as is. We figure the side panels and all the vinyl trim pieces can be done in the water. It's time to go boating!
|
(Insert New Caption)
|
|

(Insert New Caption)
|
I think my step-son's expression says it all! It was worth the wait!
|
|
|
Mid-June 2007. Here you can see the unfinished interior. I had to iron out a couple small bugs with the motor, but all is good. She was overheating our first time out and I discovered I had been a bit overzealous with the sealant when I rebuilt the waterpump.
|
(Insert New Caption)
|
|
(Insert New Caption)
|
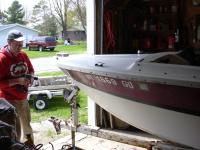
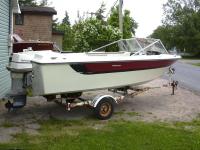
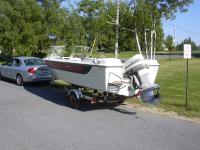
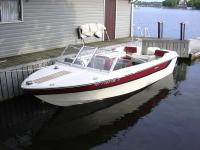
Now that's a might fine looking vessel, wouldn't you say? Bought in May of 2005, first nibble in November of 2005, really getting serious with the project summer of 2006, with first splash in the water June 10, 2007. So it took a little over a year of serious work to get it done. Still a few little things to do, like finish the interior, but we're making progress - and using the boat!
|
|
|
At my wife's request, we added a swim ladder.
|
(Insert New Caption)
|
|
(Insert New Caption)
|
We put the top back on and my wife got started on the vinyl work...
|
|
|
July 2007 - Here's the new interior (with the old seats). I even found new drink holder cups! A friend of mine has since cut me some pieces of teak to make some new step pads that will cover the rocket-launcher rod holder holes in the side decks.
|
(Insert New Caption)
|
|
(Insert New Caption)
|
And just because I think it's cool looking, I found a 1976 Johnson 85hp cowling to dress up the plain white of the 1984 Johnson motor - and now it matches the vintage of the boat to boot!
|
|
|
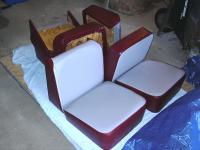
May 2008 - Well, after nursing the original seats along for a summer using drywall screws and duct tape, we took them to a friend of ours back in December for a rebuild. We just picked them up last weekend and they look great! Still have to install the hinges and build the base boxes, but we're excited to have them done!
|
(Insert New Caption)
|
|

(Insert New Caption)
|
Got one of the base boxes assembled, so I dummied up one of the seats for a look-see. I'll cover the base in the red vinyl once the other one is done.
|
|
|
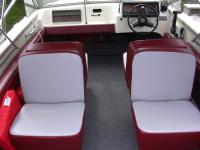
New seats are in! They really make the boat! I'm glad I went with rebuilding them rather than buying aftermarket seats.
|
(Insert New Caption)
|
|