|
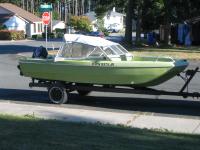
The 17', 1970 LasVegas, Sahara, open bow, runabout.
|
This is the boat as it first looked when I got it. It has two mismatched tires on it, no spare and a worn out cable for pulling the boat up. The rollers are resting on the metal part of the trailer right down the middle. Both trailer lights are in a sad state of disrepair. The wiring harness was cracked with bare wires for the first 18" of the connector. Lots of work to do on this to make it a nice boat. Not sure of the costs or what is involved. I'll learn as I go. The boat came with a 1969 Mercury Thunderbolt 800 outboard. The prop has two large chips on one blade and the fin right above the prop has a large chunk missing on the port side. The chunk of fin that is missing will be easy to fix. Just take it to a welder and have them weld a new piece on. Should not be too difficult. Hopefully. The prop will have to be replaced. The main fuel line also needs replaced as it is in very poor condition. I tapped on the hull all around and did not find any soft spots. I guess that is good news. Smiles...
|
|
|
The bow section of the boat has some sorta glue residue on it from where some sort of carpet or vinyl flooring was at one time. The boat is really dirty. It needs a good bath and some TLC. There are no bow cushions. I'll have to buy some or make them.
|
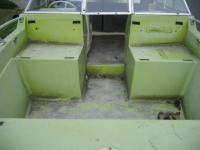
Looking in from the Bow
|
|
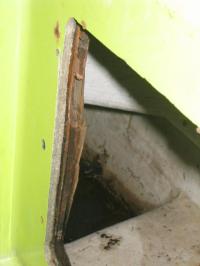
Looking into the rear transom area where the Port Aft cushion is.
|
As you can see by looking in here, the plywood is separating. I'll have to fix it but not sure as to how. My books that I order'd hopefully will tell me a great deal on this. Looks like I have lots of work here.
|
|
|
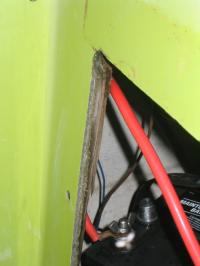
This is the battery compartment. It is rigged for dual batteries and has a Perko dual battery switch installed. There is no tray or box for the battery as it is sitting on the fiberglass flooring inside. Cables are running amuck with no order or care for where they lay. This will have to be cleaned up and straighted out.
|
Starboard cushion hole.
|
|
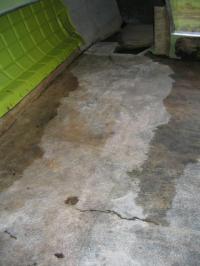
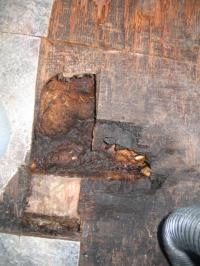
Port side flooring
|
The port side floor is in pretty bad shape as you can see. There is a large soft spot just aft of the crack that runs from side to side. There is another crack that is forward where the green siding is that runs under the open bow. There is alot of work to be done here. The floor will have to be replaced, no doubts there. Am I in over my head? We'll find out.
|
|
|
As you can see, there is moss on the wood there. That is where you step thru to the bow. This piece is loose but is somehow connected to the piece of fiberglass on the left side that is standing up. This will have to be replaced too.
|
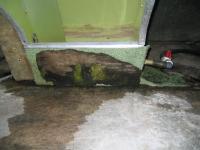
Center Flooring. Split walk thru to open bow.
|
|
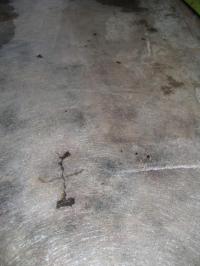
Starboard middle rear floor
|
A big crack and soft spot is right there. I'll will be replacing the floor. When I step on the cross members that this is layed on, they feel solid. Not a guarantee that they are I know. I can but hope at this point. How to remove the floor is the next question. it goes up under the sunk in open bow and nearly to the transom under the outboard / aft seating gelcoated seat placements.
|
|
|
This keel has taken one heck of a beating. I've been told that to fix it, I should roll the boat over and re-glass it with new fiber. That is harder than it sounds. How do you roll or flip a boat over when you live in a city with a small yard and no block and tackle to handle a job of this size? Hmm...I will figure this out yet. My 1st priority I guess will be the flooring. Yank it out and put in new, then move on to a new part that needs fixed.
|
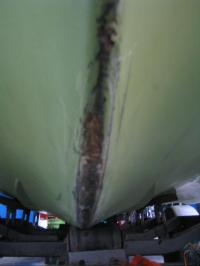
The messed up keel
|
|
Test Hole
|
I cut out a portion of the fiberglass floor and pulled up a piece of the floor to see what was under it. It looks like the foam is water logged.
|
|
|
about 2/3 of the floor has been removed and this is what it lookslike under the port gunwale. Loose fiberglass fibers. I'm not sure how to go about fixing that. I'll consult the people on Iboats.com and see what the old salts have to say. Is that what happens when water sits by the fiberglass after a while?
|
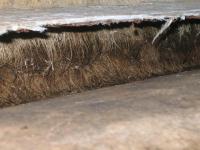
under the gunwale
|
|
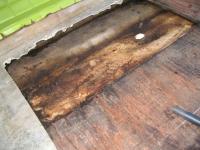
Partial floor removed
|
The floor near the port gunwale has been removed. Lots of water soaked foam and the fibers of fiberglass on the side of the gunwale are showing as can be seen in the above pic.
|
|
|
I pulled the floor up and found that the foam and plywood was rotted or water soaked. The manufacture did nothing to protect the underside of the plywood. I removed the foam as it was water soaked.
|
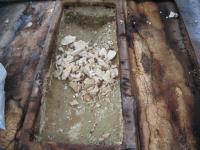
Center part of floor removed & part of foam too
|
|