|
(Insert New Caption)
|
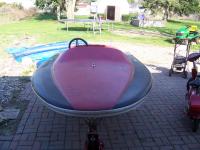
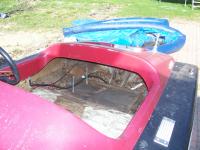
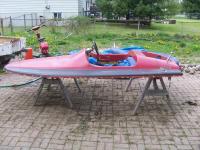
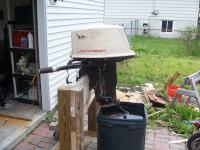
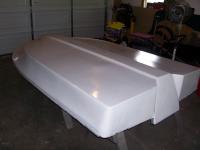
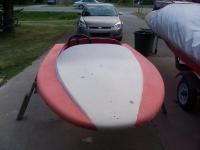
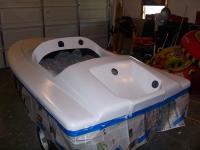
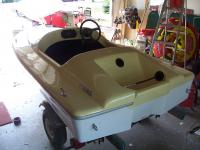
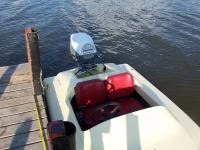
GW Invader front view before any work has started
|
|
|
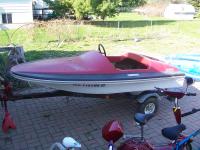
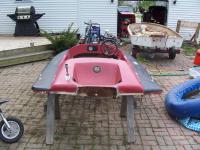
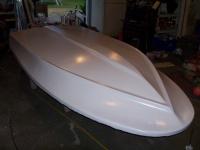
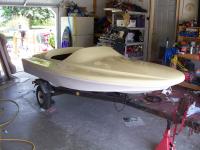
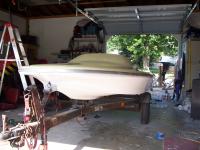
Side view
|
(Insert New Caption)
|
|

(Insert New Caption)
|
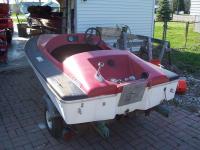
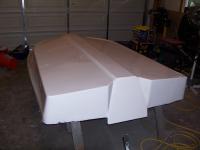
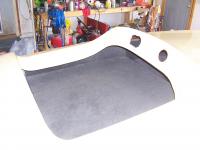
Head on view
|
|
|
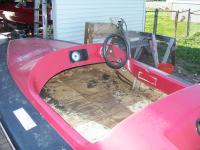
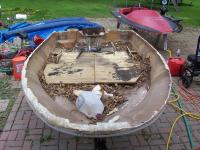
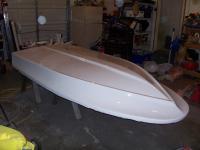
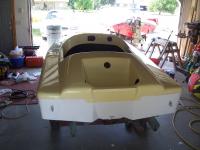
Rear view
|
(Insert New Caption)
|
|
(Insert New Caption)
|
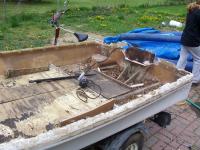
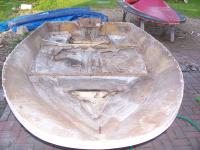
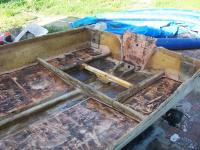
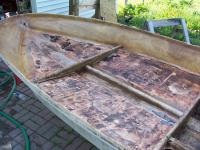
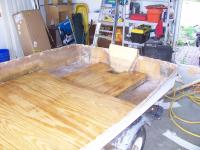
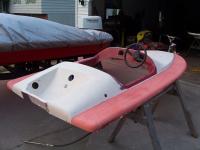
Old floor needs to be replaced along with fiberglass under floor.
|
|
|
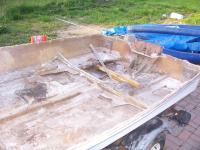
Transom is weak and needs to be removed.
|
(Insert New Caption)
|
|
(Insert New Caption)
|
Removed rivets, rub rail, and remove top part of boat.
|
|
|
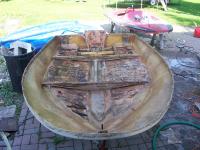
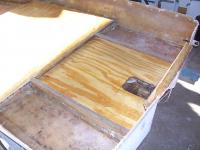
Floor is a layer of fiberglass, plywood and then another layer of fiberglass.
|
(Insert New Caption)
|
|
(Insert New Caption)
|
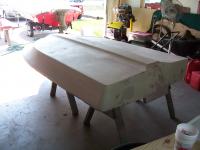
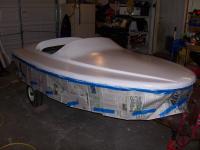
Top is in good shape with only a few cracks that need glass work.
|
|
|
Cable steering will be replaced modern helm and cable system.
|
(Insert New Caption)
|
|

(Insert New Caption)
|
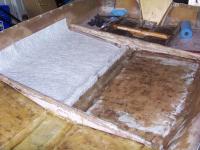
Start removing bad fiberglass and cleaning up hull for new glass.
|
|
|
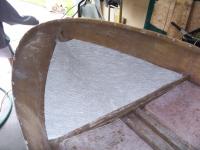
Foam in the front is full of water and will be replaced.
|
(Insert New Caption)
|
|
(Insert New Caption)
|
View of the back transom area.
|
|
|
Transom and all loose fiberglass removed.
|
(Insert New Caption)
|
|
(Insert New Caption)
|
Transom came out in pieces, really bad shape.
|
|
|
little more clean up and I will start laying new fiberglass.
|
(Insert New Caption)
|
|
(Insert New Caption)
|
Cut fiberglass mat and resin in place.
|
|
|
First of several layers of fiberglass.
|
(Insert New Caption)
|
|
(Insert New Caption)
|
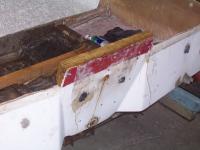
Transom, two piece of 3/4 plywood resin together and coated on all sides.
|
|
|
Transom resin in place and screwed from the back to form a tight seal.
|
(Insert New Caption)
|
|
(Insert New Caption)
|
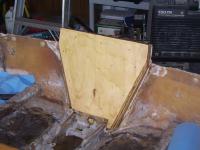
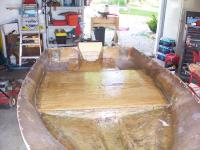
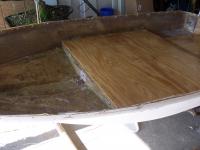
3/4 plywood floor resin and screwed in place.
|
|
|
|
(Insert New Caption)
|
|
(Insert New Caption)
|
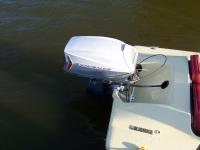
1963 18hp Johnson. GW will run about 25 mph.
|
|
|
Glassed in a piece of plywood to support battery or gas tank
|
(Insert New Caption)
|
|
(Insert New Caption)
|
Cut hole for bilge pump.
|
|
|
Bottom of hull is sanded and all holes fiberglassed and bondo.
|
(Insert New Caption)
|
|
(Insert New Caption)
|
First coat of Interlux Epoxy Primekote (404/414), 20% 2333n reducing solvent. Applied with roller and brush.
|
|
|
Sand with 220 grit and second layer of Primekote applied.
|
(Insert New Caption)
|
|

(Insert New Caption)
|
Next step, sand with 220 grit and apply Interlux perfection two part polyurethane (Snow White).
|
|
|
First layer of Interlux Perfection (Snow White)
|
(Insert New Caption)
|
|
(Insert New Caption)
|
Sand with 220 and second layer of Perfection. 10% reducer.
|
|
|
Boat had a layer of paint over the gel coat. Sanded of paint to apply primekot to gel. Look at first few pictures to see boat with paint.
|
(Insert New Caption)
|
|
(Insert New Caption)
|
Got a little fiberglass and bondo work before priming.
|
|
|
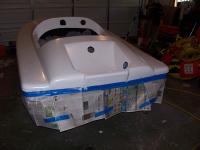
You are now looking at 2 layers of interlux primekot on the top, carpet glued in the lower and both pieces chaulk and riveted together.
|
(Insert New Caption)
|
|
(Insert New Caption)
|
Had to fill around the transom area with resin and bondo.
|
|
|
Next step is to sand with 220 and start painting the top with Interlux perfection. Top will be a light yellow.
|
(Insert New Caption)
|
|
(Insert New Caption)
|
First layer of Interlux perfection (Fighting Lady yellow). 1/2 pint with 2333n reducer.
|
|
|
Around the transom was fiberglassed, bondo, and sanded before paint.
|
(Insert New Caption)
|
|
(Insert New Caption)
|
Carpet was installed before the two pieces of the hull were assembled.
|
|
|
Second layer of paint and hardware starts to go back in.
|
(Insert New Caption)
|
|

(Insert New Caption)
|
Steering system and speedo gauge.
|
|
|
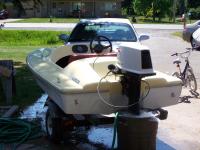
Have to mount the motor and seats. Attack the shift controls and she should be ready for the water.
|
(Insert New Caption)
|
|
(Insert New Caption)
|
Motor, steering cable, and throttle cable installed.
|
|
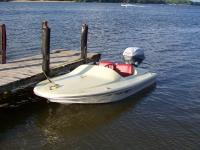
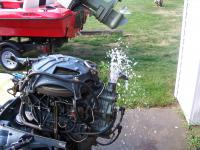
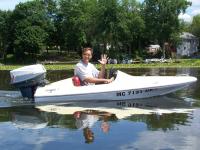
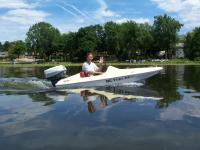
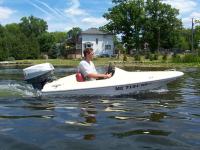
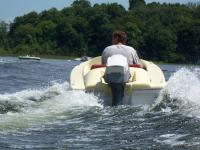
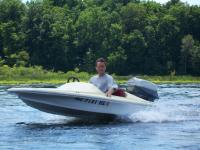
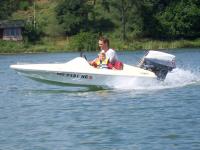
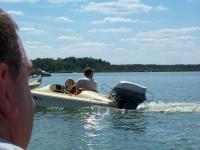
Ready for the water test.
|

(Insert New Caption)
|
|
(Insert New Caption)
|
(Insert New Description)
|
|
|
(Insert New Description)
|
(Insert New Caption)
|
|
(Insert New Caption)
|
(Insert New Description)
|
|
|
(Insert New Description)
|
(Insert New Caption)
|
|
(Insert New Caption)
|
(Insert New Description)
|
|
|
(Insert New Description)
|
(Insert New Caption)
|
|
(Insert New Caption)
|
(Insert New Description)
|
|
|
(Insert New Description)
|
(Insert New Caption)
|
|
(Insert New Caption)
|
(Insert New Description)
|
|
|
(Insert New Description)
|
(Insert New Caption)
|
|
(Insert New Caption)
|
(Insert New Description)
|
|
|
(Insert New Description)
|

(Insert New Caption)
|
|
(Insert New Caption)
|
(Insert New Description)
|
|