|
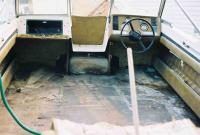
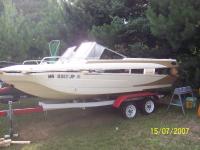
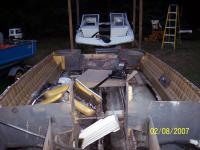
seats and vinyl removed
|
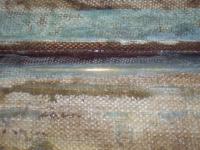
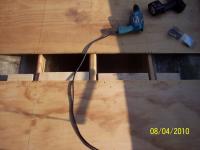
lots of soft spots in the floor here. Glastron simply laid fiberglass over plywood for the floor
|
|
|
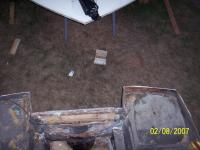
Floor was the worst back here.
|
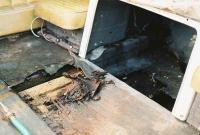
splashwell/bilge
|
|
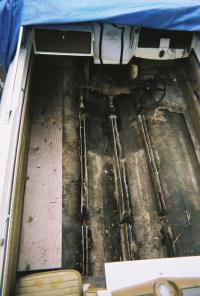
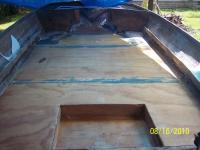
Flooring mostly removed
|
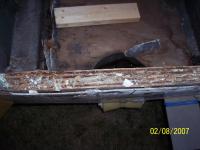
Removed rotted stringer core as best as I can. First thought was to block and foam what is left and cap with new fiberglass, but am second guessing that course of action
*update* Still not fully decided upon, but know now that I'll have to bed any solid material I put in the stringers to avoid "hard spots" in the hull to avoid stress/cracking. Research, research, research!
|
|
|
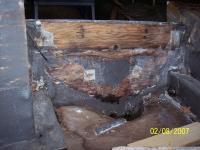
Hard to get all the flooring out with the splashwell trapping part of it along with the seats...I think I'm going to take the cap off, or just cut the splashwell section off and reglass it on....transom needs to be done anyway.
|
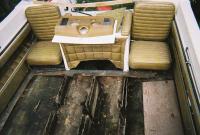
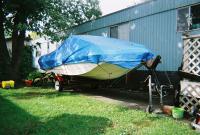
rear seats and splashwell
|
|
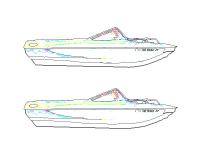
paint by numbers!
|
Played with a picture in photoshop. My skills are weak.
|
|
|
Thought about black metal flake paint with red accents...might be a bit too warm during the sunny days though...
|
playing with photoshop
|
|
photoshop goodness
|
Think I'm going to go with a variation of this paint scheme
|
|
|
(Insert New Description)
|

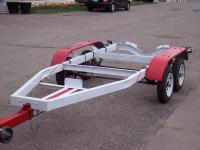
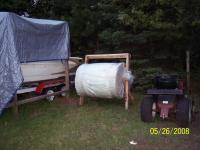
First boat trailer stripped bare
|
|
Finished!
|
Added bunks instead of rollers, everything else is original to the trailer
|
|
one problem, this trailer has a max capacity of about 1300lbs.
I need a bigger trailer!
|
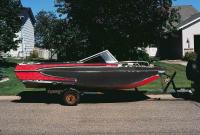
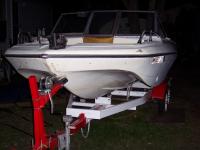
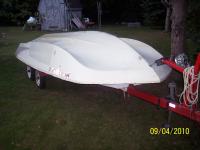
boat on the trailer
|
|
trailer freshly put together, sans bunks
|
I wish I had taken pictures of it "before", it was a real basket case.
I "traded up". This sucker will handle my boat and then some.
I could technically use some more work on the axels as some of the bushings are worn, but it pulls nicely with the boat on it with double bunks. Interstingly, it's got 12 inch tires just like the old trailer!
|
|
|
It's only on single bunks and center rollers, got a lot of tinkering to do to get it right.
|
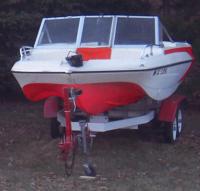
boat on freshly painted trailer
|
|
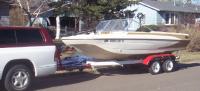
boat in front of the new house
|
Now I just gotta find a place to start doing some serious work to it!
|
|
|
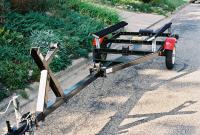
right next to the boat my dad gave me. Still have to tinker with that trailer, it's listing a bit to the side still..oh the joys of aligning a complex curve on a set of bunks properly.
|

found a place!
|
|
crack the shell
|
After removing a few dozen screws, busting through the bedding material in the transom, I separated the top from the bottom. Progress! Now I have to get it off of the boat completely!
|
|
|
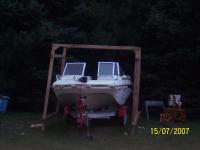
Got a bunch of 2x3's from my dad and started hacking them together to build a structure to lift the cap off with. I've got 4 pulleys and 200ft of braided rope waiting. The ground isn't level, so I have to adjust my structure some before doing any lifting, and I'm going to do some more bracing just to make sure it doesn't fall apart when I start hanging some weight on it.
|
framing it up
|
|
Up, up and away!
|
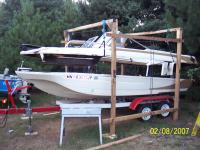
frame created, pulley's purchased and hung, strung rope and started pulling the top off little by little. I was surprised at how heavy this thing was, especially with the work split up between 10 pulleys.
|
|
|
I got it up, now I gotta get the bottom out!
|
hovering
|
|

Shifty
|
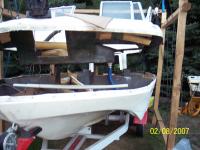
Not as easy as I thought it would be, that garden tractor had a tough time just getting the wheels out of the divots they were in ( next time, planks of wood under them to support the weight ). I'll definitely need help when I put the top back on the boat and put the bottom back in that frame I made.
( editors note: I do not know what happened with the image , it's supposed to be my boat and it shows up on my edit page. I can assure you it was not one I loaded up..I'd love to know how it got there though )
|
|
Wow, what a mess. 2 saw horses holding up the top currently. The next hard part is going to be flipping the bottom over so I can paint it after repairing the stringers, transom and floor.
NOTE: After monkeying with the transom, I've decided against flipping the boat to paint it. With the cap off, the sides are much too weak to support the boat being flipped, I'd have to reattach the cap for support.
|
Seperation complete
|
|
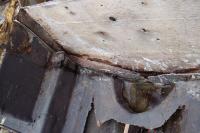
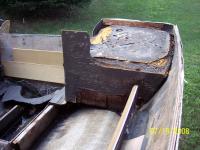
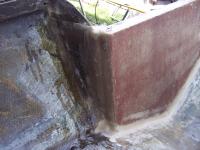
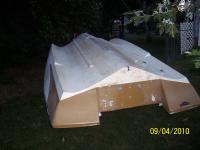
old transom
|
The whole point of the separation was to get to this baby right here. Funny, it's not in that bad of shape all things considered, though the outer skin has separated from the wood, so it's coming out. No point in leaving it as "good" when I have the chance to make sure it STAYS good forever...if I can figure out how to replace it with SEACAST.
|
|
|
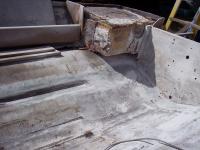
The gray is bilge coat, which I've scraped off as best I could to determine the shape of the transom wood before I pulled the cap off the boat. Since Glastron only tabbed the transom in on this side and I plan on using SEACAST instead of wood, I'll have to make some kind of fiberglass plate to cover that area and bond with the seacast to become part of the new transom. Boy, what have I gotten myself into?!
|
old transom part deux
|
|
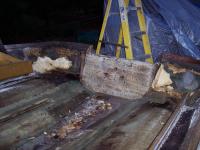
Knees?
|
I had originally thought I'd add Knees to the transom when I redid it, but it seems that there was already a system in place. I'm not sure what I will end up doing....more planning is obviously needed before I make a decision.
|
|
|
gotta get that wood out of there....time consuming
|
transom
|
|
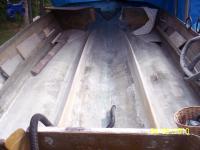
no more wood
|
transom wood removed. sweat equity. chiseled and pryed most of it out until I got to the bottom, the a 1" spade bit on an extension made quick work of the rest of it. Pretty clean when its all said and done, but I'll have to build an inner skin if I'm going to use Seacast pourable transom to replace the wood that was there. By the calculations sheet, I'm looking at 10 gallons of material...not going to be cheap, but will be permanent and never have to be done again.
|
|
|
but I didn't dull the tip and she poked through the bottom in a few places. good thing I've got plenty of fiberglass!
|
spade bit did a great job
|
|
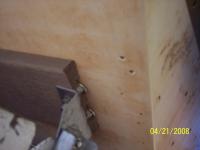
composite decking for bunks
|
This is a shot of the bunks I'm currently using. In the previous picture, you can see what happens when you try using this stuff as a step into the boat. Snapped off right at the lag bolts. So, that needs to have some sort of reinforcement if I use it again.
|
|
Okay, now I wish this was all the fiberglass I'd need to buy, but it's only 3/4oz CSM ( chopped strand mat ) . Meh, I picked the whole thing up for $50. There's gotta be 300yards there or more!
Anyone need some fiberglass? :D
|
Fiberglass acquired
|
|
I think this foam needs to come out.
|
Aug 16, 2008 and I'm still at this point. I'm hoping to get something done this year, but I'm currently stalled with other more pressing projects. One big hurdle to get out of the way and I'm hoping to have that transom at least done before fall.
|
|
|
enter the grinder and 40 grit flap discs! They made quick work of the remaining stringer glass after I zipped the lengths of glass off with a diamond blade on the grinder. This much was accomplished in 1 1/2 hrs with one 40 grit disc.
|
Finally got to grinding the old stringers out!
|
|
yup, the foam came out!
|
Got in there with a regular old saw and cut out the foam blocks in the corners. It needed to happen so I could get the rest of the flooring out, as well as the remaining wood tabs that act as knees for the transom.
|
|
|
I got a little carried away removing the old glass that had tabbed the wood stringers in. I hate to say, but the employee(s) that worked on my boat did a crap job of saturating the mat fibers as I ground out quite a bit that was dry below the surface. This is something I plan to not replicate. However, I also don't plan to replicate this little boo boo, as I ground out a little too much glass and got to the backside of the gel coat. Lesson learned: 40 grit likes to eat glass. Use it for demolition and grinding humps and large leftovers off, not for finish level work!
|
whoopsie!
|
|
finished grinding the old glass out
|
unfortunately, we've got some extra repairing to do. It's amazing how easy it is to zip fiberglass thin with a 40 grit flap disc on an angle grinder. You'd think those things would get dull after a few passes!
|
|
|
Glastron in all their wisdom decided to run glass over this void instead of using a piece of wood with glass over it. Why, I have no idea, but they bridged this area and tapered it out with glass filler. I'm not removing it, but I will run the deck wood up to it and glass over it...why waste a good part of the boat and give myself more work?
|
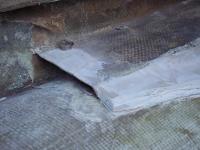
hey, what's this?
|
|
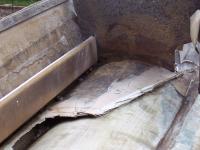
hey, what's this? This is what!
|
Here's the same area before I shaped it. The cavity underneath was supposedly completely sealed off, but I'm going to make sure the whole area along that part of the boat gets sealed off...it sure collects water!
|
|
|
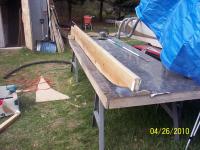
Finally, forward progress! The 1 1/2 inch solid Mahogany transom wood is glued in! I used 1/2inch bolts and PL premium adhesive. One contractor sized tube was enough for the 20x30inch transom. I used a 3/8ths notch trowel to spread the glue and let it sit for 48 hrs before I unbolted it.
|
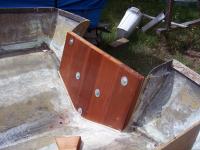
Mahogany transom pt.1
|
|
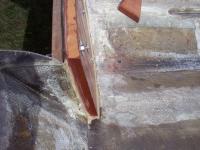
Mahogany transom pt.2
|
I used a little bit of PL that squirted out and a little extra to "fillet" the corners and smoothed with a a plastic spoon. It looked great until it was cured..the PL has a tendency to "dome" as it cures.
|
|
|
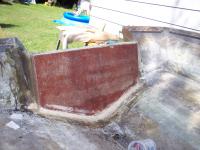
I had the drain plug hole drilled for the bolt, but that was it, and we got a storm before I pulled the bolt! After draining 20-30 gallons of water, I installed a proper drain plug. I sure was glad I coated the wood with spar varnish before I installed it or I would have risked glassing in wet wood!
|
Bad timing! No drain plug!
|
|
proper fillet
|
radiused the transom so the 2 layers of mat would conform to the hull properly
|
|
|
I may have to build up a little more up top to take up the required thickness gap for the splashwell bolts so I don't stress the glass there, but otherwise it's done! Total of 1 layer cloth, 2 layers mat. Used about 1250cc's of polyester resin. ( approx. 1 quart )
|
glassed in transom
|
|

repaired hull
|
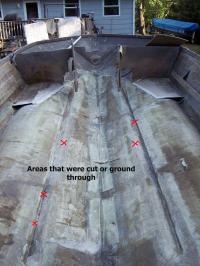
grinding out the hull proved dubious. I ground areas thin, cut through a couple of places and generally was overzealous. Fortunately, nothing was major. I layed a strip of 1708 biax down the strakes where I did the most damage, and then used the same plus some left over mat in areas that wouldn't get additional glass from the rebuild.
Next up, stringers!
|
|
|
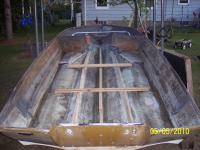
Both stringers are installed with 1 layer of 1708 biax 10 inches wide on either side of each, with CSM capping the tops off. The center has been ground down smooth to accept the center stringer, which I made double the width since it is the spine of the boat.
|
two striners complete!
|
|
the center stringer
|
So, I screwed and glued two 1/2 inch boards together and have a layer of the same Biax glassed over the top. Next up, Glue the stringer to the boat. I'm using PL premium to glue all my wood to the boat as it has a superior bond ( the claim is that it will bond two pieces of wood with frost on them ) I've been more than happy with the results so far.
|
|
|
all three stringers installed. Next up, the deck!
|
3 stringers!
|
|

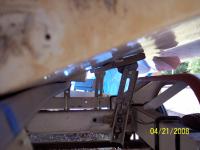
deck roughed in
|
From the original foam sheets I used to make my first set of templates, to hard templates made from 1/4" ply to the 1/2" ply I cut the deck out of, here is the finished pieces set in place for the final test fit.
|
|
|
Glastron used unprotected boards running across the stringers to support the original deck. I didn't want to notch my encapsulated stringers and risk water getting to the wood, so I made sections of wood to bridge the gap. I glued them with PL premium and then screwed them to the deck with 1 inch screws after securing the section of flooring to the stringers with PL and screws. Then the next section of floor glued down with PL along the stringers and the exposed tabs. Screwed and glued, rinse and repeat.
|
deck joint support
|
|
Deck installed, seams filled
|
Well, there it is. All seams filled using short strand marine filler.
Glassing the deck will be the larger challenge.
|
|
|
well, everything was actually running along smoothly. I figured that this large of an area to saturate and roll out by myself would be a challenge. The challenge wasn't as much getting the bubbles rolled out or saturating the cloth, it was managing my resin. The shop said that I good glasser would get the whole roll of mat that I bought done with a gallon of resin. Guess what, I ran out. Always make sure you have more resin than you need. The white you see is where I ran out of resin partway through a section of the mat.
|

deck glassing
|
|
flipped the hull
|
Now that the deck is in, I can start working on the cosmetics of the boat. This required flipping the hull. Fortunately for me, I had two trees sturdy enough to use for this task. I hooked a chain to the tree and then lifted the nose of the boat as high as I could and hooked the chain on. I did this by using the winch to lift the front of the trailer up as high in the tree as I could, hooked the chain to the bow eye and then reversed the winch to let the trailer down.
|
|
|
I picked up a hand winch specifically designed for overhead lifting up to 1000 lbs. This did the trick nicely. I picked up some chain for the transom and started cranking. I had originally tried just using some woven rope that I had been using to lift the cap. It broke as I started to rotate the hull. USE CHAIN.
|
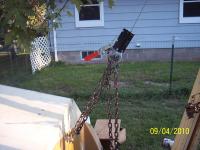
Skyhook!
|
|
a new home
|
a full view of the aqua lift 2 hull nestled nicely on the trailer. I was lucky that it just cleared the fenders, but I had to block the hull up with some 2x3's I had laying around, otherwise it would have had issues with the formed glass on the sides of the hull for storage.
|
|
|
so, now I've got myself read for the next project. Hull prep and painting. When I first bought the boat, I knew this part wasn't going to be easy.
|
rear view of the aqua lift 2 hull
|
|

(Insert New Caption)
|
Flipping the hull required the use of chains and two trees. I used an overhead come along to pull the transom side off the boat after using the front winch to jack the front end up. I managed to do almost every single thing to this boat by myself.
|
|