|
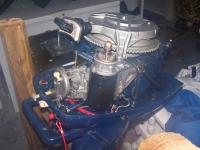
1972 25hp Evinrude Sportster
|
The motor was used regularly on the river by the previous owner. I rebuilt the carb, changed the plugs, replaced the push-button kill switch with a lanyard style one and put in a new impeller just to be safe. I also put on a new prop because the old one was starting to slip.
|
|
|
Took her out in the lake. No leaks. Rebuilt outboard runs great.
|
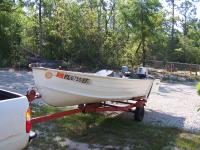
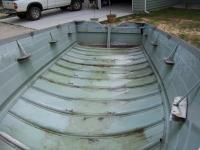
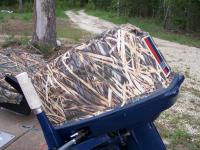
Before
|
|
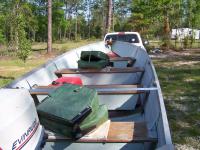
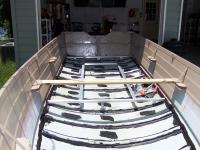
Before-Inside of boat
|
Casting deck will go where the front two bench seats are.
|
|
|
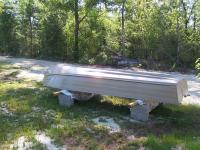
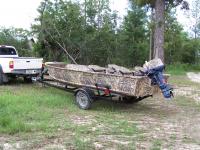
You can see in this picture that the trailer is too short for the boat.
|

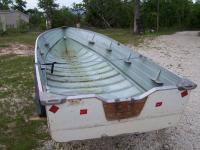
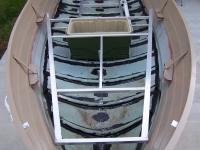
Before-Other side
|
|
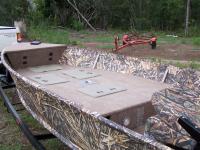
Striped down and ready for sanding
|
Front bench brackets will be used to help support the casting deck.
|
|
|
Transom is in good shape. No rot.
|
Transom
|
|
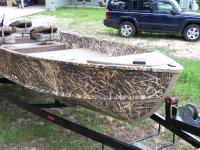
Primed and Painted
|
I primed with a self-etching primer and painted with a Khaki camo paint. Next comes the new (used) trailer and the floor and deck bracing.
|
|
|
Got this for $50. It's a 1988 Tidecraft trailer. It came with an old 1988 Tidecraft bass boat. The boat was striped of everything. The gel coat was shot and there was a couple cracks in the hull. I took the boat to the dump.
|
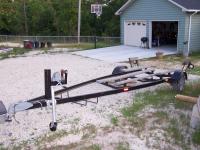
New (to me) trailer
|
|

New Trailer
|
The trailer is in overall good condition. The carpet on the bunks could probably use replacing soon. Since the boat will spend most of its time in the boathouse, I've decided to replace the carpet later.
|
|
|
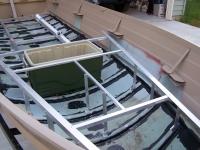
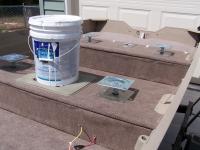
I coated all the seams and rivets with Duplicolor truck bed liner to help prevent future leaks. All floor bracing is made with 1/8" aluminum angle. The boards across the front seat brackets are temporary braces that I will use when I start building the bracing for the front deck.
|
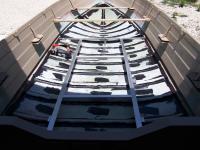
Floor Bracing
|
|
Floor Bracing (From the Front)
|
All aluminum angle is put together using 3/16" aluminum rivets. The braces are connected to the stringers using self-tapping scews.
|
|
|
Finished the casting deck bracing today and put in the cooler that will be used as the livewell. Notice the cooler sticks up about 1/4" above the bracing. I didn't want to cut the cooler. So, I will mark the outline on the bottom of the 3/4" decking and route out a groove for the lip of the cooler to fit in.
|

Casting Deck Bracing
|
|
Casting Deck-Front View
|
The 2" PVC pipe running under the floor bracing in the back is for running the wiring.
|
|
|
You can see the bracing underneath the casting deck. All connections were made with 3/16" aluminum rivets. The connection to the ribs is made with self-tapping screws. Next-Plumbing
|
Bracing
|
|
Plumbing and Wiring Installed
|
Livewell and bilge pump installed. Plumbing ran under floor bracing. All wiring for pumps, lights etc ran in 2" pipe under floor.
|
|
|
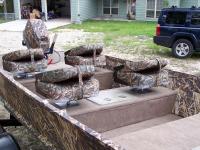
I finished installing and carpeting the floor, casting deck and seats. Vertical pieces under casting deck and front deck will be completed once finish wiring is done. There is 2 part floatation foam under the floor up to where the livewell is.
|
Flooring, seats and casting deck installed and carpeted
|
|
Camoclad Cowl
|
I decided to do the motor cowl first as practice.
|
|
|
The Camoclad wasn't too hard to work with. I found it easier to work with by cutting the 5 foot sheets in half. I had so much left over that I decided to do the inside of the boat as well. It also really helps to deaden the sound of the aluminum if you accidentally bump it.
|
Camoclad Done
|
|
Front Deck
|
The front deck has a livewell, battery compartment, cooler and dry storage. There is a seat base for one of the seats and a pedestal. There are 3 12v plugs on the front and a TM plug.
|
|
|
All the switches for the livewell pump in/pump out, aerator, lights, bilge, etc are on the edge of the front deck.
|
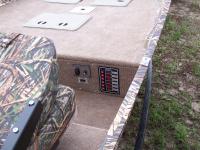
Switch Panels
|
|
Rear Deck
|
The entire center bench is storage. There is a third seat base between the 2 rear seats and a little farther back. The rear deck is only about 4 by 5, but it is better than having to stand on the bench alone.
|
|
|
All that I have left to do is get the TM, fishfinder and I'm also going to put a bimimi top on the back.
|
Almost Done
|
|