|
The very beginning......of the money pit.
|
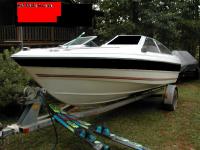
The boat as I found it, or purchaced it last Aug. for $1200.00. I was playing with some window tinting in paint so forgive me. If I knew then what I know now, that boat would still be sitting there....but whats done is done.
|
|
|
(Insert New Description)
|
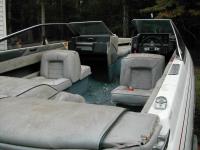
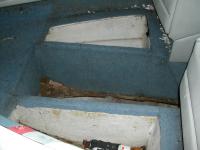
Inside of boat before purchace.
|
|
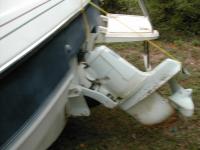
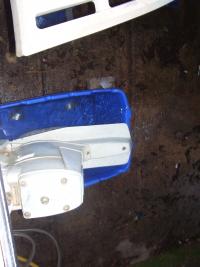
Volvo Penta 270 Outdrive....
|
(Insert New Description)
|
|
|
(Insert New Description)
|
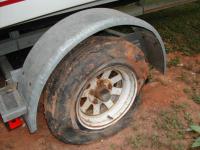
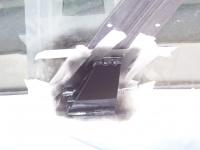
Tires!!!!
|
|
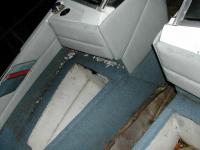
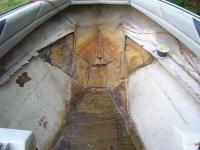
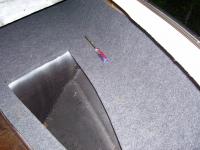
Bow with out cushions
|
(Insert New Description)
|
|
|
Notice the nasty rot spot on the top of the left side. Ohh joy, signs of things to come.
|
Another angle of the bow sections.
|
|
And the Destruction has began!!!!!!!!!!!
|
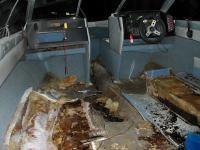
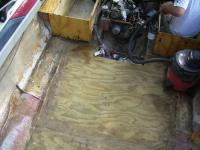
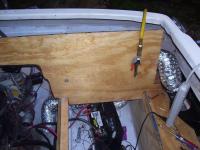
The first sign of rot was the floor of the bow. With further inspection....Hmmm the entire floor is soft. It must all come out. In this picture, I removed the seats. Bayliner builds the seats into the floor so even if they were not rotten from top to bottom, I would have likely destroyed them removing them.
|
|
|
All of the floatation foam is entirely soaked with water..it too must come out.
|
Another angle...
|
|
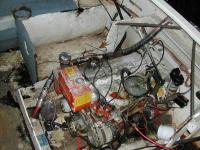
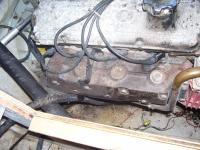
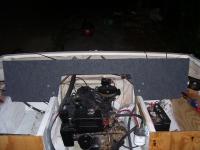
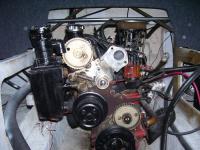
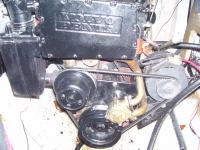
The Volvo AQ125B 120 HP
|
This motor looks like it needs to be in a junk yard. I checked compression and cyl. 1-3 had 160 psi (spot on factory) and cyl 4 had 155, damn good considering the age. It cranked with a little help from some starting fluid. But, as I always do: Get ready!RUNNING TOTAL:
Coil: $15
Spark plugs: $12
Rotor: $30
Points: $11
Wires $65
Impeller: $38
Solenoid: $53
Carb rebuild kit: $65
Battery: $45
Alternator rebuild: $60
$394
Total: $1684 so far
The bright side is, the starter was good and posisbly something else.
|
|
|
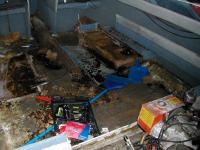
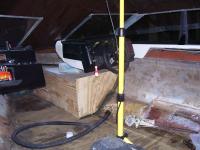
New fuel sender and line, filter and bidgle bulkhead. This is where I have a gap in the pictures. I dont have any pics of me cutting it out or installing the new stringer and replacing the floor. I removed the fuel tank and cleaned it inside and out. When I reinstalled it, I put a 1/2 inch bead of caulk on the belly from front to back. Bayliner had little rubber strips that were rotten, so the caulk did well.
|
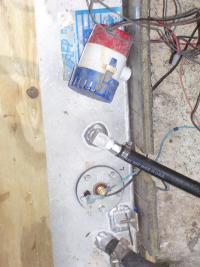
Fuel tank refrub
|
|
New glassed bow
|
I used 1/2 pressure treated ply for the entire floor. The way I figure it, factory uses untreated ply and it lasted 15-18 yrs. Treated should out last that , I'm not going to have this boat for more than 3 years. I also used 2 part poly resin, gallon for $44 at local paint an body shop.
|
|
|
All new switches, Radio Shack, Gauges, well, I'm still not sure if the speed works right, I know the fuel, Tac and Amp works, all else needs to be tested. throttle controll work great. Boat will recieve a new wheel, the pad on this one is rotting.
|
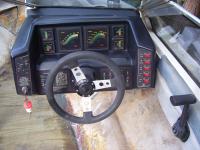
New electronics
|
|
Fresh painted window braces.
|
Every little bit makes it look better!
|
|
Much to notice in this pic. I rebuilt the rear wood with regular 1/2 pine ply, then glased it over. I AM NO CARPENTER so please don't make fun. I can correct many wood mistakes w/glass. Also, notice no coolant resivor, SP? The coolant tank/heat exchanger was removed to clean and torquing the thermostat housing backdown, one bold broke. Damn, my so at this point, it has not been reasembled. Asof today it has with new SS bolts! $$$
(My girlfriend took these pics so I have to pic and choose. I'm busy working in the background!)
|
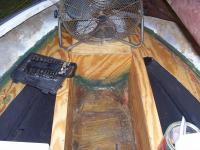
View of rear floor and rear structure.
|
|

The beginning of the new bow
|
First of all, I must thank a man named Nigel Sturkie for building these for me, for free! (hes my cousin) This guy has skills beyond any I have ever seen when it comes to wood. He did this in 45 - 1 hr. I did the glass work, its ugly where no one can see but that life now isnt it?
|
|
|
Its going to rain tomorrow so I trew the tarp on it.
|

Diffrent angle
|
|
Back of new right bow area.
|
You can't see it, but the wood structure is segmented for flotation foam, and we also made the "kick plate" vertical versis diagnal for an amp rack. And I'm short, I don't need that much leg room!
|
|
|
No fancy vinyl here, I am having vinyl designs cut for a special touch. Besides, I have no sewing machine and I'm not going to buy one. Notice the wood hand rails, now black. They wouldnt take any stain, and i don't dig wood grain on anything, even wood. The original foam was still good! I purchaced the vinyl from a fabric store for $6.99 a yard. Its marine grade vinyl too. As of
|
Vinyl!!! 4/26/2006
|
|
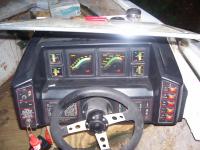
Dash while engine running
|
I am so happpy to see that the Tach, Oil Temp and Engine temp gauges still work!! The fuel works now after a new sender unit. The voltameter works good to. I was relieved because gauge packages cost $100 +. Notice the illuminated switches I installed. I may disable the light for the bildge, because i have an float switch meaning if I leave the switch light on, it will drain the batt.
|
|
|
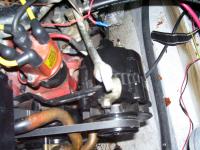
On a Volvo Penta 270 out drive, this is the way to do it! The foot has a drain hole on the bottom that water just pours out of with the muffs. So after enough duct tape, I figured this out! Works great! Make sure you remove your prop. I think you can figure out why.
|
To hell with the muffs......
|
|
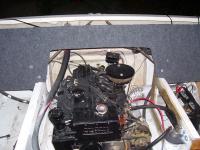
Front angle of motor.
|
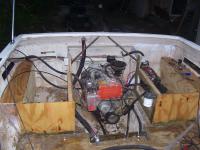
Front end of the engine compartment.
|
|
|
I have to say, a guy on IBOATS.com forums had the idea to use a clear tube to see if your his boat was sucking water. I did it and it works great!
|
Sea water intake hose
|
|
Foot spewing water
|
(Insert New Description)
|
|
|
This exaust manifold will need to be replaced soon. It has water dripping from the under belly of it. I hope it is going to last this season. They run about $300 clams.
|
Exaust manifold
|
|
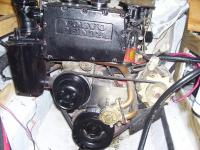
Motor has first coat of paint.........
|
I painted the motor so I wouldnt have to look at that salt oxidation that I have been swearing at so long. I used a wire brush drill fitting and removed most of the corrosion with no problem. Shiney metal is what I like to see. 500 degree engine paint in semi-gloss worked well.....even though people will never see the motor...Notice the Alternator...still the old Paris-Rone unit that is BAD. Its been tested and that is confirmed. I'm having trouble locating a replacement for less than $300.00. If any one of you reads this, (if anyone does), you can find me on Iboats.com and I will be all ears!!!
|
|
|
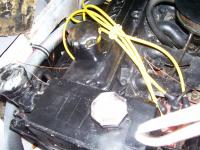
In this pic you can see much more...notice new fuel lines and filter. Don't get use to the battery setup, I'm going to have dual batts with an isolator mounted in batt boxes. That is still to come.
|
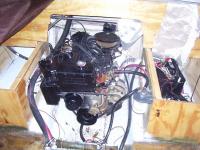
Larger view of motor compartment
|
|
New blower duct and blower
|
I installed a new blower and duct so i don't blow myself up. I purchaced foil duct for the heat resistance. I'm sure plastic would have worked fine but the foil seemed much stronger. To my suprise, after a carb rebuild, and all new fuel lines, I have no gas vapor in my bilge. No noticable smell of any gas.
|
|
|
Once again, I must thank Nigel Sturkie for this! You may be thinking, "Why the hell did he spray the inside of the compartments black????" Its 3M rubber coat. At $13 dollars a spray can, I figured it would give it some resistance to some idiot slinging an anchor in there and damaging the hull. And that idot would be me!! I don't know yet if I want to carpet everything or Rhino line the entire boat. I need to get an estimate for the liner. If they can come in below $400, I may do that for carpet(The kind that I want) would probably be that much if not more.
|
New glasses bow compartment.....
|
|
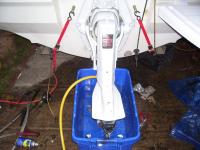
Out drive recieved some TLC
|
I sprayed the outdrive with flat white paint. I removed the shift cover and removed the 270 plate and used model paint to give it a new color scheme. Its been raining here for many days so I had to do something that could be done inside. You should have seen my girlfriends face when I had that dirty part on the coffee table! Not to mention the vinal pieces on the kitchen table!!! Ha Ha The exaust and drive bellows look good....I went over them with 3m rubber reconditioner, If this boat treats me well, They will be replaced next winter.
|
|
|
Half of the bow carpeted. I used outdoor carpet from Lowes for a about $3 per yrd. Lowes also had the adhesive and all tools needed. Warning, that glue is some messy S**T!
|
New Carpet
|
|
Another angle
|
(Insert New Description)
|
|
|
This was a pain in the A$$ to carpet due to the corners. I recommend patients.
|
Newley carpeted ...well, I don't know what that thing is called.
|
|
Motor compartment
|
New screws in flame arrestor and trim motor. Use locktite or lockwashers on the trim motor, those little guys will back them selfs out in no time.
|
|
|
Lucky for me, Wesco trailers are based here in SC, so I got new tires and wheels for $64 per tire! I packed the berrings and painted the hubs black as well.
|
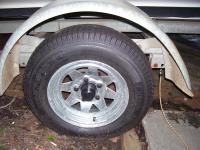
New tires and wheels.
|
|
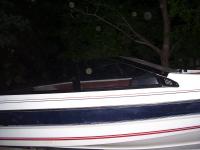
Painted windsheld supports
|
I painted the cloudy windsheld supports gloss black. The were so discolored it brought down the boats apperiance.
|
|
|
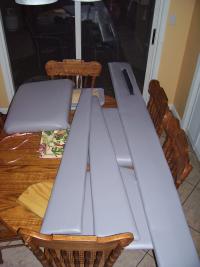
New seats, more expensive than I wanted to spend but no wood in the entire lounge seat. All SS screws to!!! The base will be carpeted to make it "blend with the floor". Pictures of that to come!
|
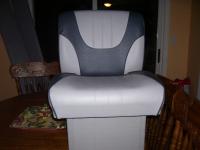
Seats!!!
|
|
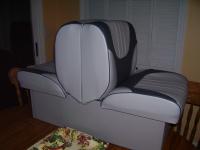
Another angle of seats...
|
|
|
|
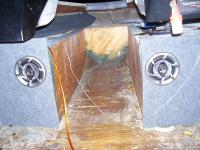
This is the early stages of the stereo install. I got the stereo bubble in today and had to grind, really grind the hole out of the dash just for the case. Its much bigger than the factory hole. But the sound will be much bigger than the factory sound!!! I used a 4 1/2 grinder CAREFULLY in combination with a Dremal tool with sanding bit to make the hole large enough. This is plastic on top of .25 fiber. I think I did ok. The head unit was given to me with out the plastic flange so it looks kinda funny in the cover, but I think it will work for now. Comming soon, 2 6X9s, 2 5 1/2s and maybe a Bazooka tube, depending.
|

Stereo install....
|
|
Cover down
|
The cover still has the protective film on it in this pic. It will be removed.
|
|
After many hours of the motor running, The timing belt jumped teeth. I kinda glad it jumped on the trailer and not im my shark hole in Beaufort, SC. The old belt was no doubt factory or close to it. The new timing belt should be here in the morning and be installed by the night. The only issue is, I has to remove most of the cooling system, E.G. Coolant res, impeller and housing. The exchanger can stay. I figured out that my tentioner was locked (or not spinning that good) so the belt jumped. I removed the tentioner and lubed it up. It was so slick what it was slipping out of my hands durring install. But now, the time is all out of wack, but I have 2 diffrent manuals and I think I can get the new belt on in the right fashion. I will take many pictures of the procedure for I can find no info on this on the web about timing belt changes on the AQ125.
UPDATE:
I installed the new timing belt. Its not to bad, besides the fact that you have to remove the cooling system and risk damaging seals reinstalling it. After it was installed and the cooling system was reinstalled, it cranked like a champ. Slapped the timing light on it and set it to a perfect 6 degrees BTC. It cranks with 1/4 turn now.
|
The timing belt issue....
|
|
Timing marks..
|
One issue I had, when I removed the timing cover, the timing mark on the dampener and the mark on the crank didnt line up. This was strange to me. But come to find out, it was exactly perfect. They do not line up at all.
|
|
|
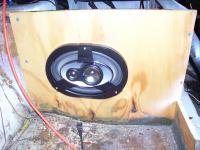
Lighting audio 5 1/4 mids for the front of the boat. I cant explain how loud these two speakers are with 40 watts per channel.
|
5 1/4 inch speaker install
|
|
6 X 9s
|
New Lightning audio 6 X 9s in the back. The Precision Power 400 watt amp should be delivered in the morning. In the mean time, I hooked them up to the spare 40 watt channels on the head unit, and WOW! Now I'm thinking I don't need the amp.......Hmmmmm but on second thought.....its 400 watts!!
|
|
|
New bat boxes and 4 guage wire. The isolator hasnt come in yet so the batteries are wired together for now.
|
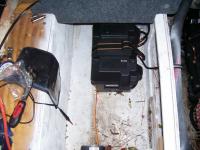
Dual battery setup
|
|
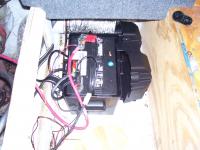
Crank battery
|
Crank battery in a new box. The boxes ran about $6 at Wally World. The batts ran about $50. Installation is easy.
|
|
New timing belt and new accessory drive belt. The timing belt ran about $35 from go2marine.com and the acc. belt about $4 from your local auto parts store. Its a common belt between FORD, Chevy and Volvo....who would have thunk it??? I can't start to describe how good this motor is running now.
3/7/07 UPDATE What ever I did at this point worked so well, well, to put it this way, I uncovered the boat after 3 months, climbed in, gave it 2 throttles of gas, turned the key and crank! Thats after charging the batts for 24. I didn't fog the carb. I did pour Sea Foam in the tank so the gas was in good shape.
|
New belts
|
|
New wires
|
Don't let anyone fool you, I purchaced a Accell V8 wire kit from Summit Racing $27, cut to length, crimpt and installed. They fit perfect on the Volvo distributer cap. The only problem, the high tention coil wire is a little short, forcing me to purchace a black one. I installed 4 NGK plugs at proper gap. This motor cranks under 1/4 turn.
|
|
|
I installed a Petronix flame thrower coil. Its rated at 40000 volts and is said to work well with the eletronic ignition. (Not the best pic)
|
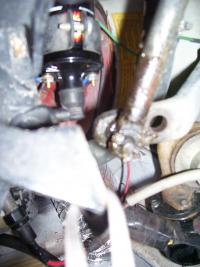
Flame thrower Coil
|
|
New, used mando alternator.
|
I still having trouble with this one. It seems to get really hot when charging. Not sure its in top condition. This part is pending due to storms in the area.
|
|
|
Looking back, I threw the Mando alternator away. I purchaced a 1 wire Delco self exciting alternator that works great! The only thing about it is, you have to rev to about 1500 RPM to get it to charge. It dose not charge at idle. The carpet is completely done. Seats installed. (Pictures comming) This pic is in Beaufort, SC. Gorgeous country isn't it? Anyway, That AQ125B jerked 4 adults, 2 dogs and a large cooler 'O' beer out of the water and...well you can see the picture. BTW..its a 19 and half ft boat. The E-Tec that the pic was taken off of had 3 adults and 2 kids and a cooler. You do the math.
|
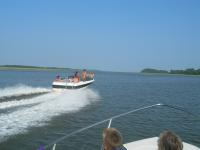
What has happened in 8 months! Me passing my Brother -N- Law (Evinrude E-TEC 90) Shake-down run
|
|